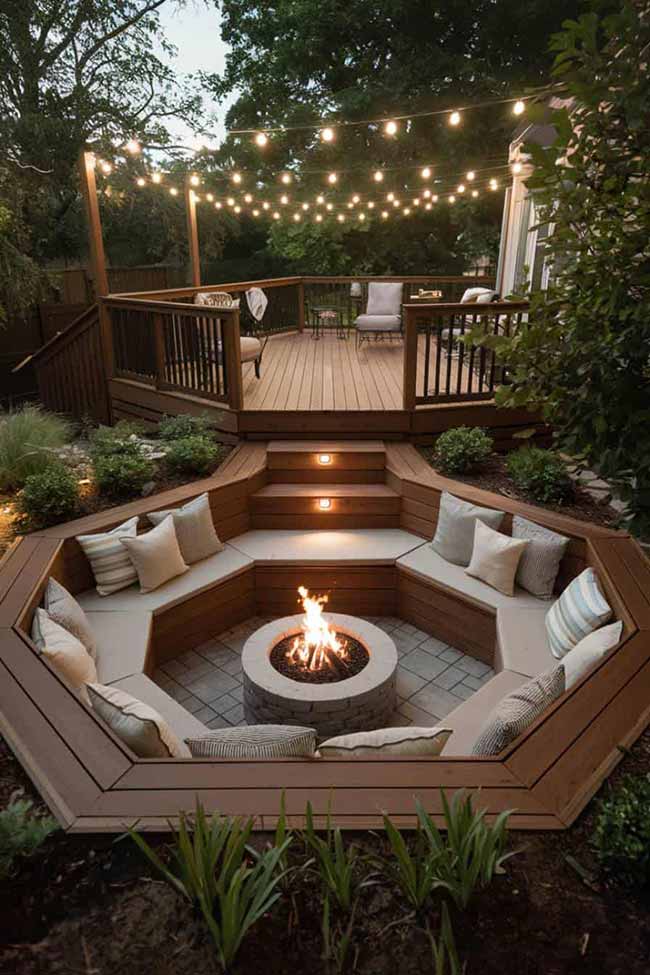
21 Awesome Sunken Fire Pit Ideas To Steal for Cozy Nights

A fire pit can enhance any outdoor gathering, creating a warm and inviting atmosphere for spending quality time with family and friends. Sitting by a fire pit is a delightful experience that everyone can enjoy.
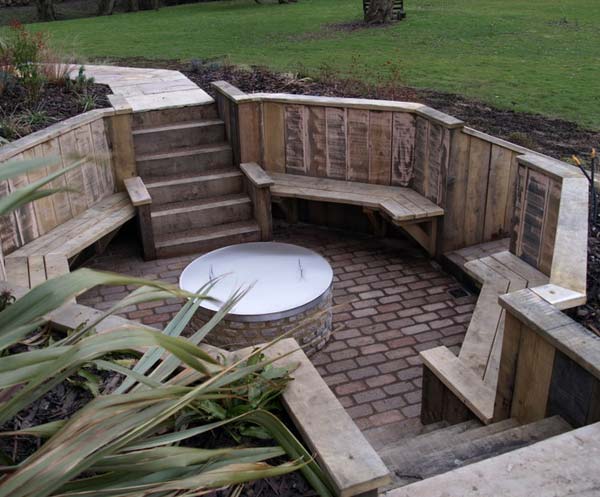
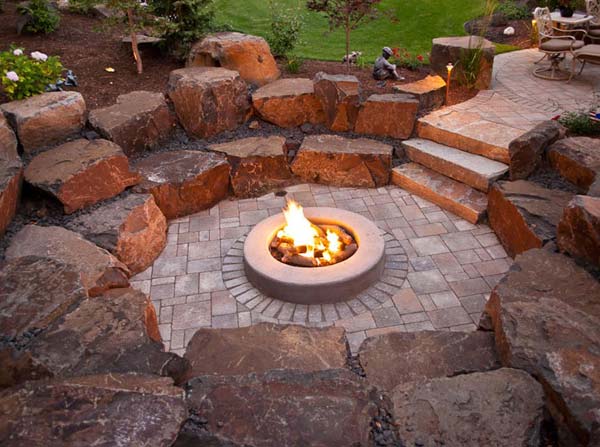
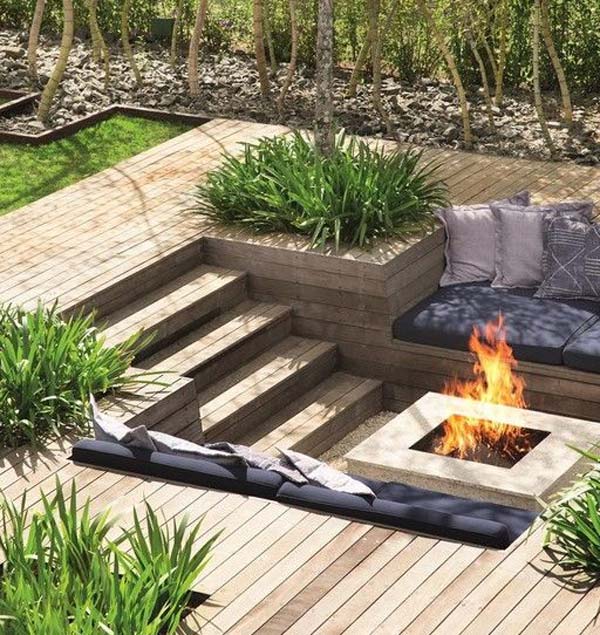
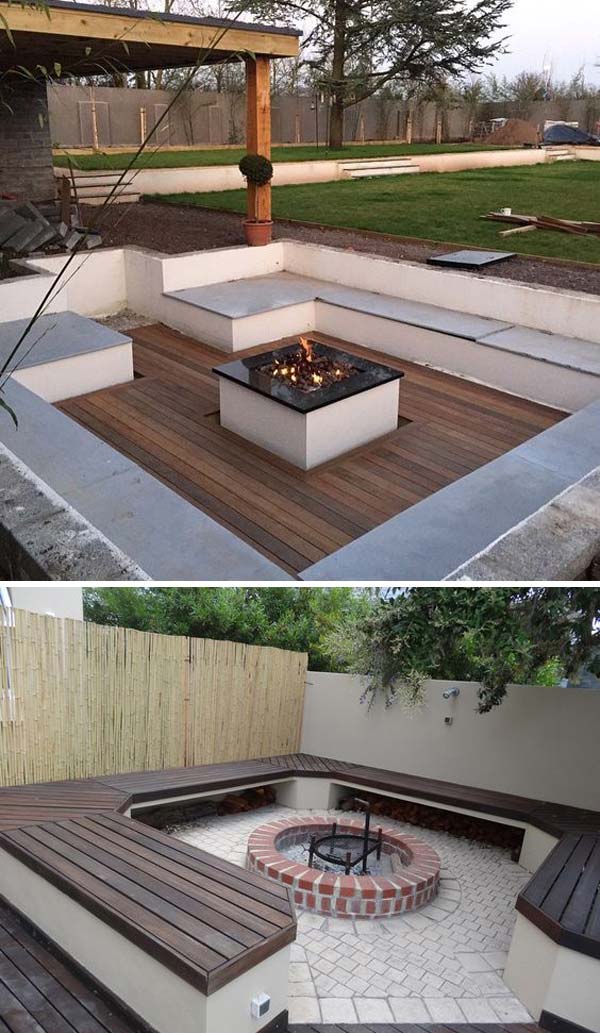
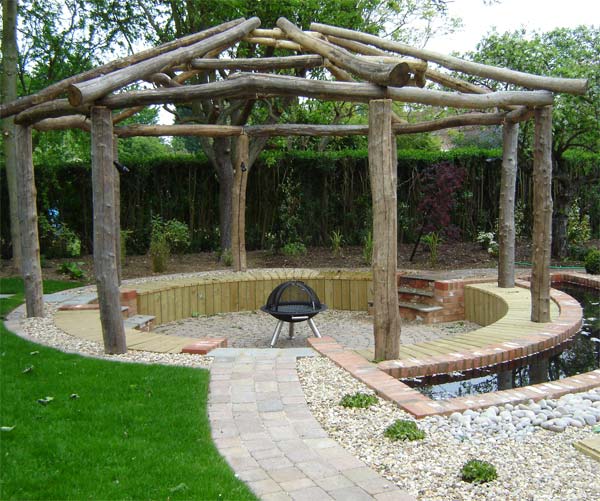
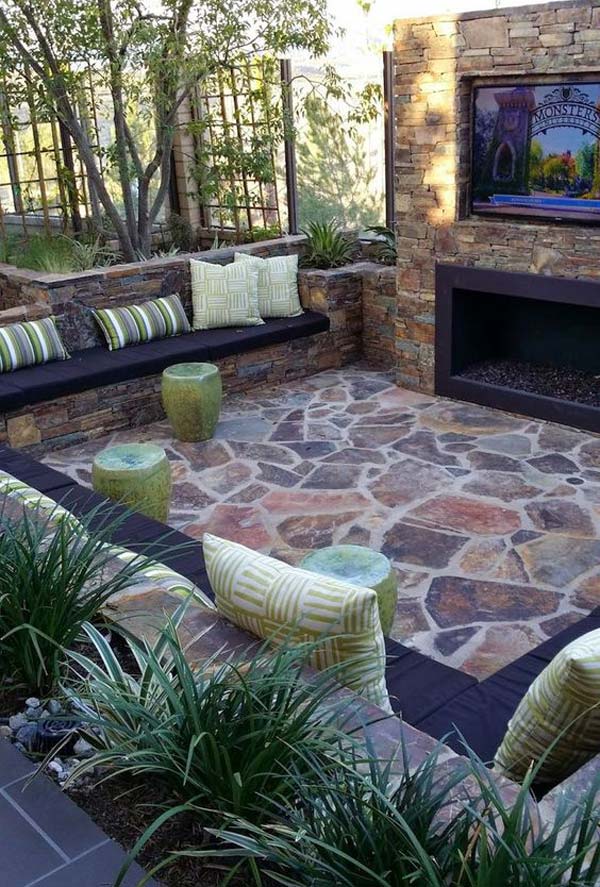
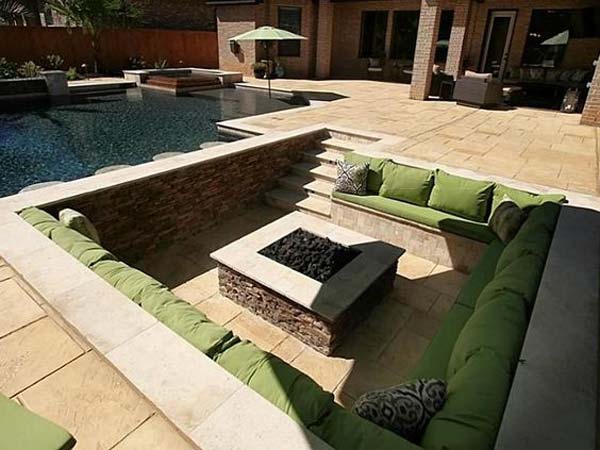
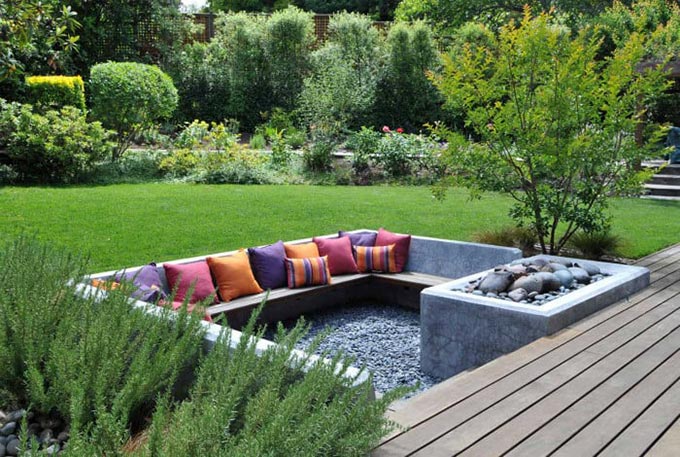
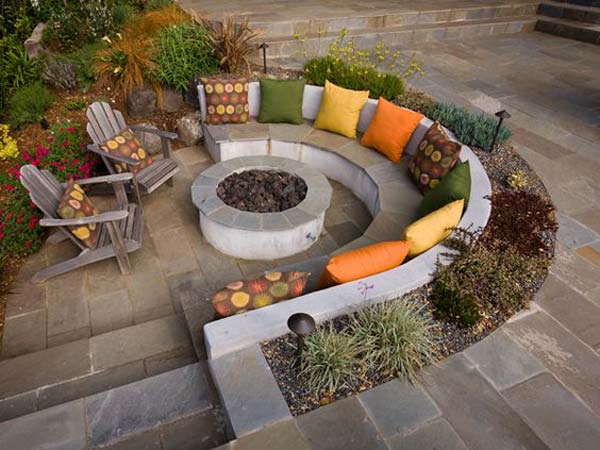
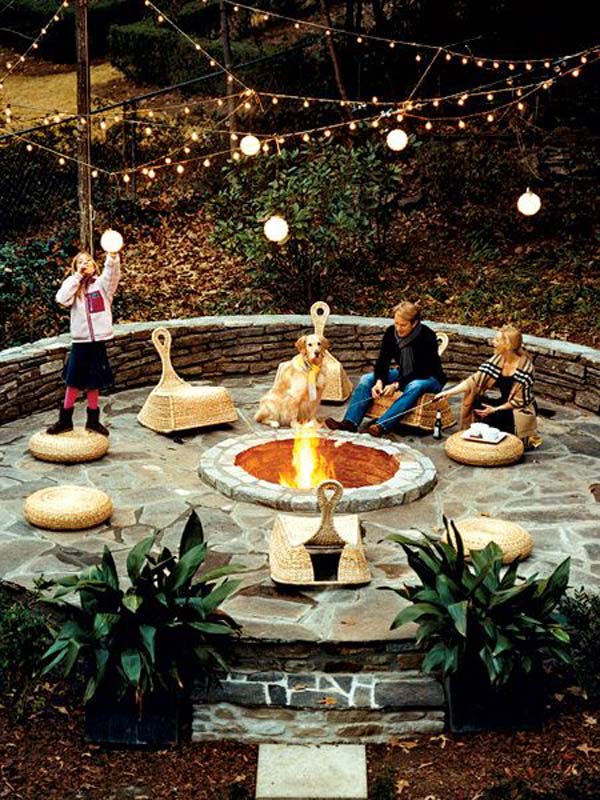
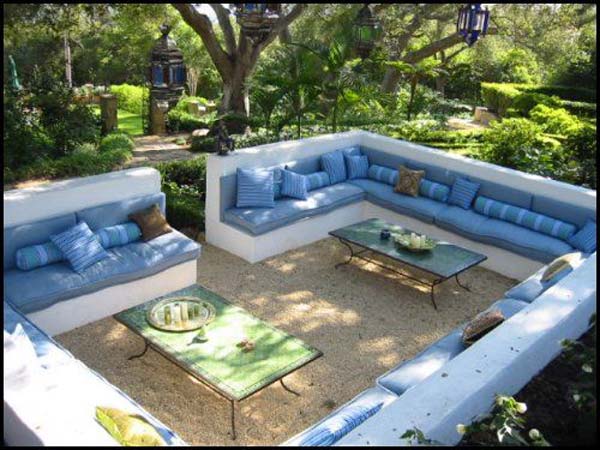
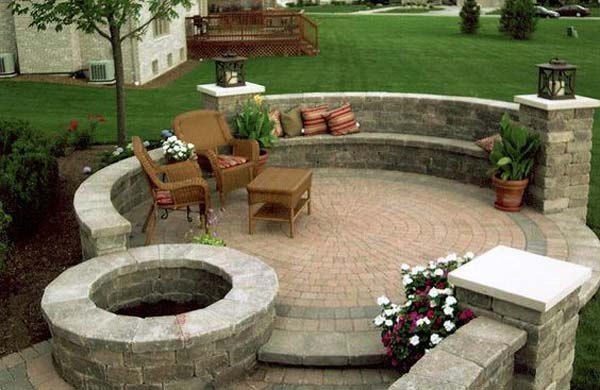
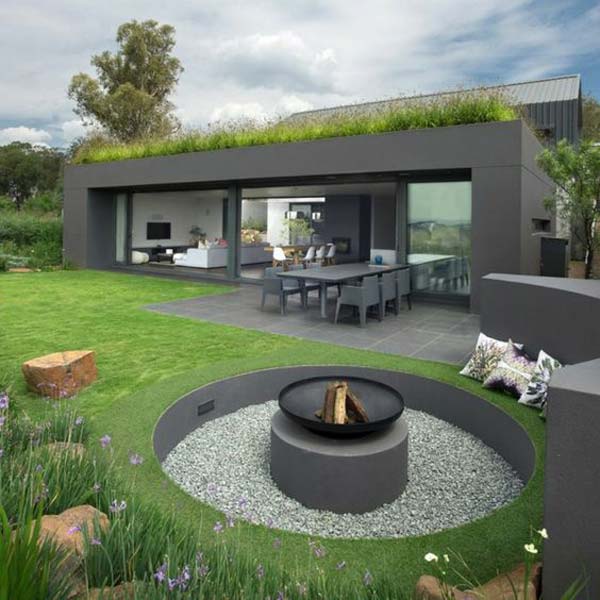
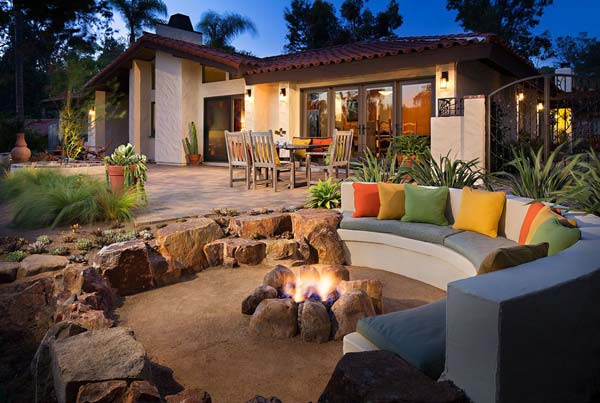
While most fire pits have surrounding benches for socializing and dining, sunken fire pits with seating areas offer a unique and comfortable design that’s perfect for relaxing outdoors. The sunken area provides a sense of intimacy and warmth, making it a great space for unwinding and socializing, especially in the evening. If you’re considering a sunken fire pit, take a look at the showcase below for some great ideas.
What is a Sunken Fire Pit?
A sunken fire pit is a unique and stylish outdoor feature that is built into the ground, providing a cozy and intimate space for family and friends to gather around a warm fire. It is usually made of stone, brick or concrete and can come in different shapes and sizes.
See more great sunken firepit ideas:
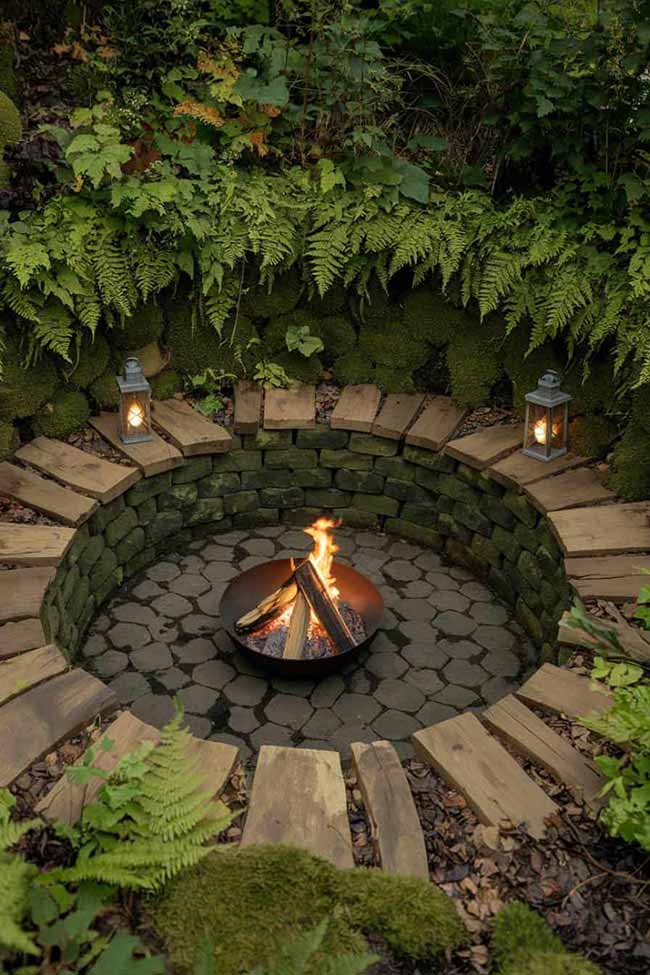
Forest-Inspired Rustic Hearth
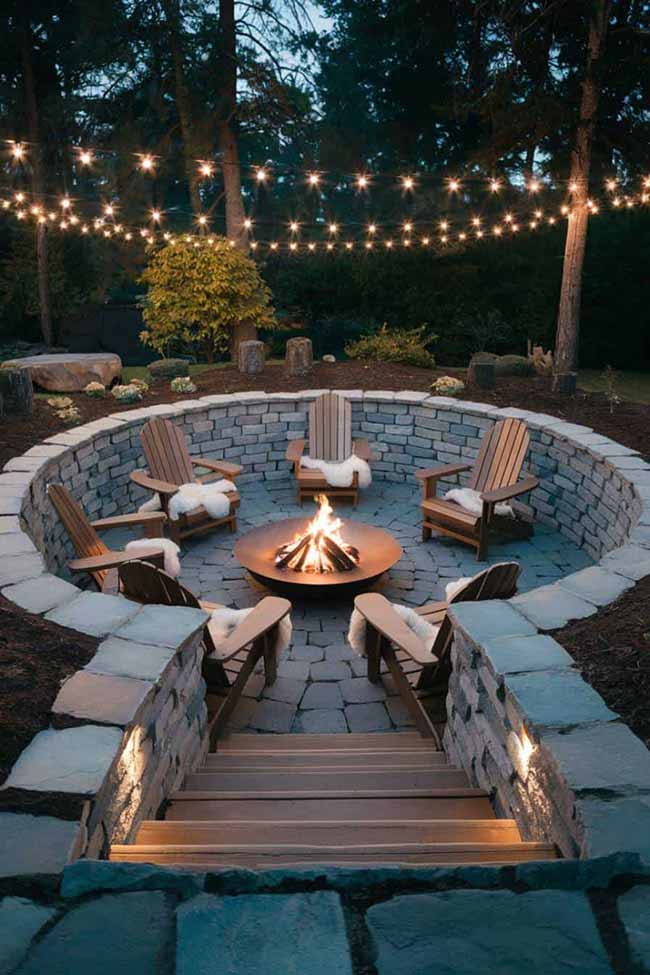
Imagine cozying up by a firepit surrounded by nature. This sunken firepit, with its stacked stone walls and wooden plank floor, gives you that perfect forest retreat vibe.
Throw in some wooden Adirondack chairs for seating, and add a couple of plush fur throws to keep things extra comfy. The cherry on top? String lights overhead that cast a warm, magical glow, making this spot perfect for a relaxing night under the stars.
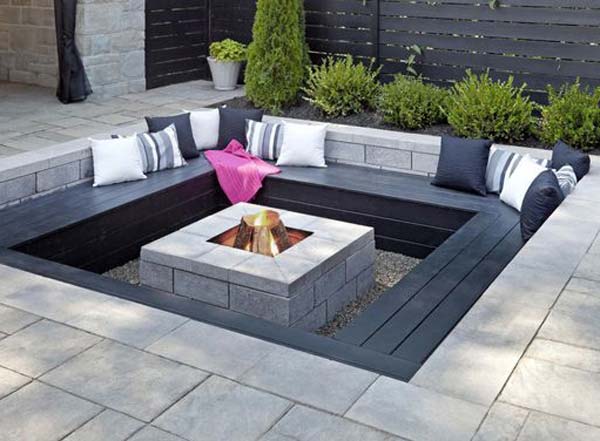
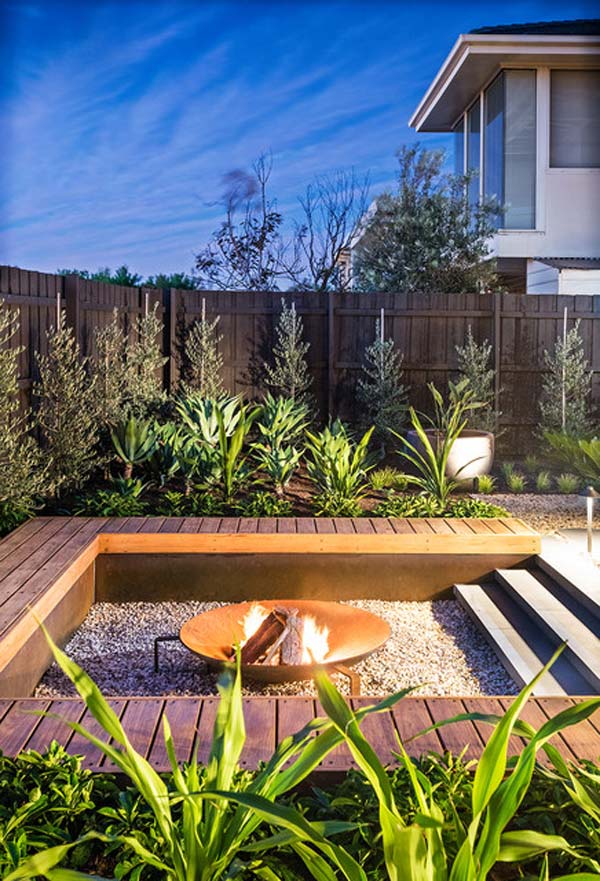
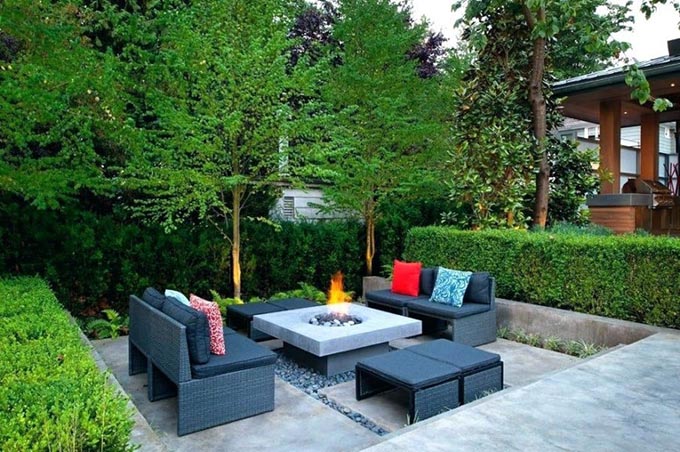
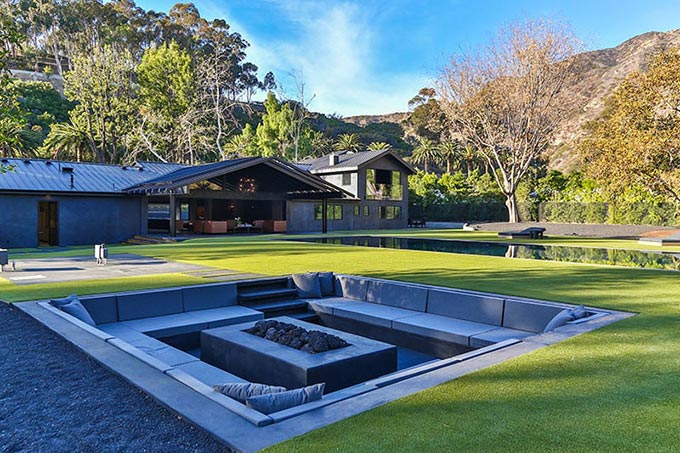
Sleek Modern Zen Firepit
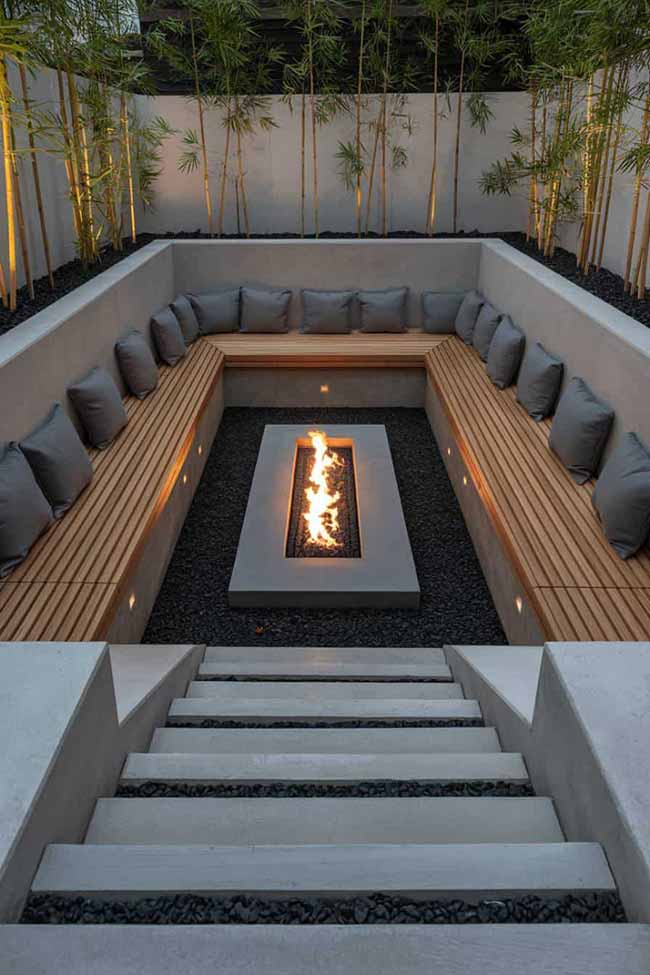
For a peaceful and minimalist escape, a square sunken firepit with smooth concrete walls and a black gravel floor will do the trick. It’s simple yet sophisticated, creating a calm and serene space.
Pair it with sleek teak slat benches and soft gray cushions, and you’ve got the perfect modern seating area. Add bamboo touches and recessed lighting to complete the Zen-like atmosphere, making it an ideal spot to unwind at night.
Nautical Driftwood Comfort
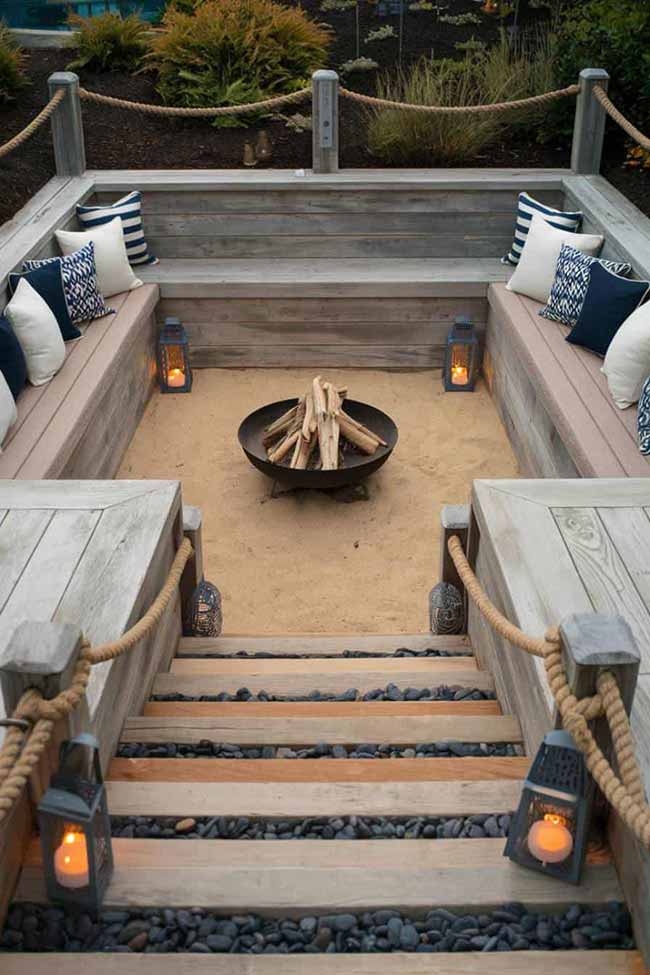
If you love the idea of coastal charm, this sunken firepit with weathered wood planks and rope-wrapped railings is perfect for you. It gives off a breezy, nautical vibe, enhanced by sand and gravel underfoot.
Add some teak seating with crisp white and navy cushions for that classic coastal look. To finish it off, scatter a few lanterns around the area for a soft, beachy glow—perfect for a laid-back evening outdoors.
++++++++++++++++++++++++++++++++++++++++++++++++++++
DIY Sunken Fire Pit With Seating:
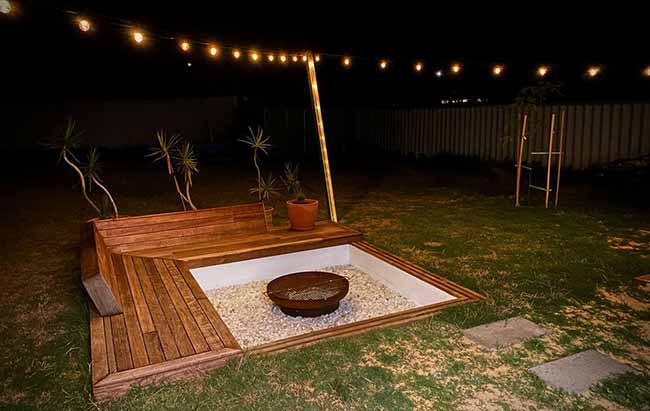
Building a sunken fire pit with seating is a fantastic way to create a cozy and inviting space in any outdoor area. By following a series of organized steps, anyone with basic DIY skills can build a functional and stylish fire pit, complete with comfortable seating. Here’s how to get started:
Step1. Plan and Dig the Hole for the Fire Pit
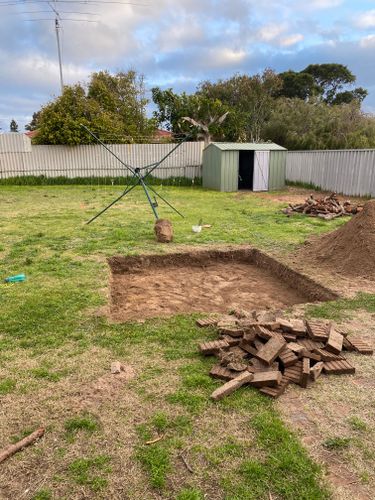
The first step in creating a sunken fire pit is determining its desired size and depth. Measure out the area carefully to ensure that the space is sufficient for both the fire pit and the seating. After marking the dimensions, begin digging the hole, making sure to go deep enough to accommodate the fire pit’s base and ensure stability.
Step2. Dig a trench next and fill it with cement to securely anchor the concrete blocks.
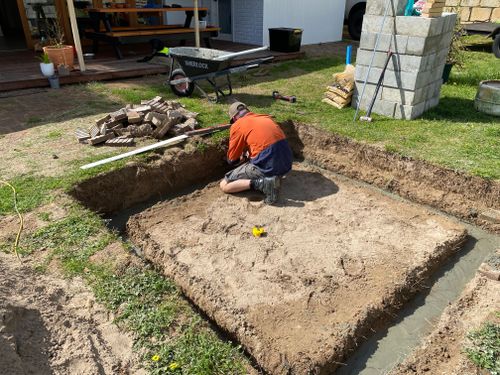
Once the hole is dug, the next step is to create a solid foundation. Dig a trench around the perimeter of the fire pit area, and fill it with cement to secure the concrete blocks that will form the outer ring of the pit. This trench acts as an anchor for the blocks, providing the stability needed for the entire structure.
Step3. Layer two rows of heavy concrete blocks to form the base.
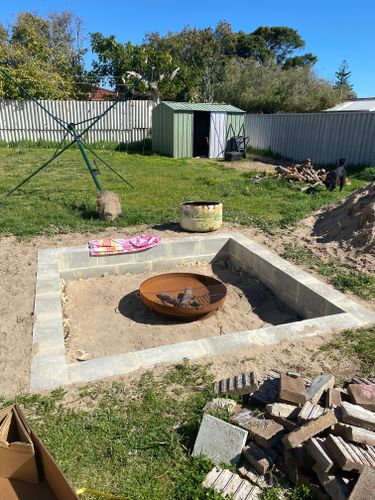
For the base of the fire pit, two rows of heavy-duty concrete blocks are stacked to form the foundation. These blocks are essential for providing strength and durability, ensuring the fire pit can withstand the elements over time. Carefully arrange the blocks to create a level surface, ensuring that each one is securely placed.
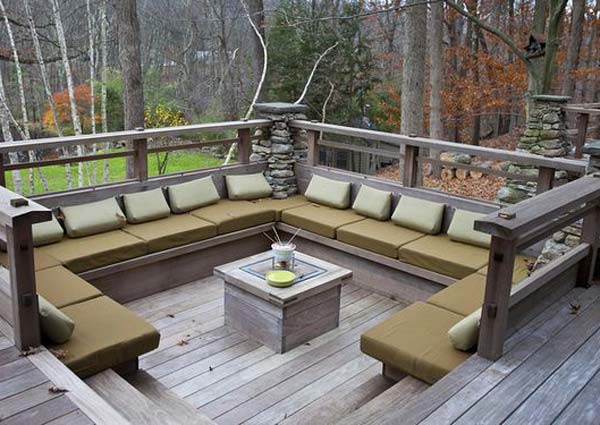
Step4. Build the frame using lengths of timber, experimenting to find the right dimensions for your bench seat.
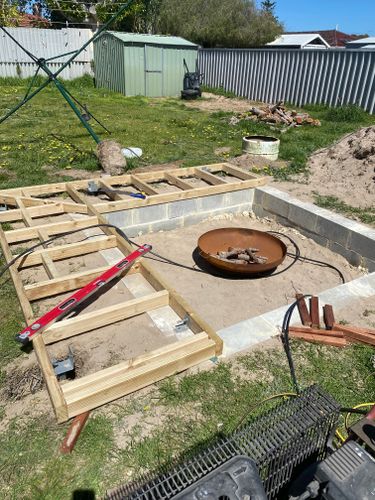
Designing the seating area involves constructing a frame using lengths of timber. This part of the process may require some trial and error to get the bench seat exactly how you want it. It’s important to think about the seating’s height and comfort. While building, take the time to adjust the frame to suit both functionality and aesthetics. Ensure the frame is strong enough to support the seating and is aligned properly with the fire pit.
Step5. Once the back of the seat is completed, begin adding the decking boards.
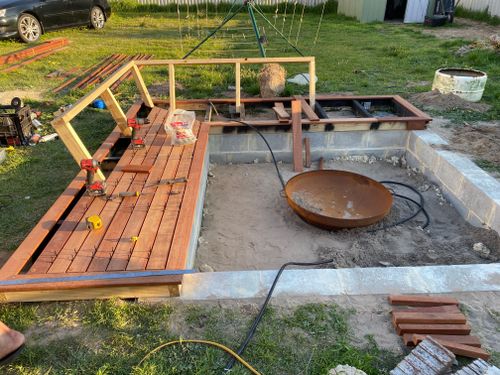
After finishing the frame, move on to the decking. Use high-quality timber decking boards, such as Merbau, to create a solid and visually appealing seating surface. Merbau decking boards are known for their durability and beautiful finish. Attach the decking boards securely to the frame, ensuring that each board is evenly spaced for a polished look.
Step6. Finish attaching the decking boards and add strips along the concrete blocks to enhance the appearance.
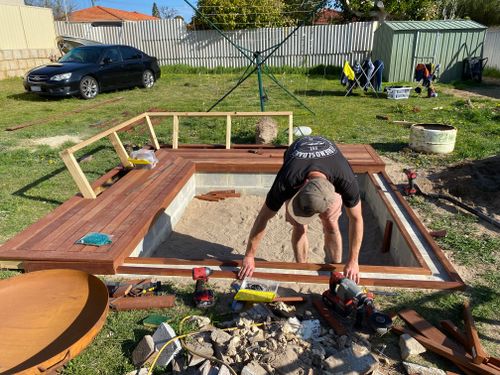
Finish the seating area by securing the decking boards in place. To add a polished touch, add decorative strips along the base of the concrete blocks, covering any exposed edges and enhancing the overall appearance of the fire pit structure. These simple finishing touches create a sleek, cohesive look.
Step7. With the seating in place, add final touches such as painting the concrete blocks white, laying down a weed mat, and spreading white pebbles.
Once the seating is complete, it’s time to focus on the finishing touches. Begin by painting the concrete blocks white for a clean, modern look. Add a weed mat to the dirt inside the fire pit area. This allows for drainage while preventing weeds from growing. The mat helps water to flow through, keeping the area dry and preventing soil erosion. Then, cover the area with white pebbles, which complement the clean aesthetic and help with drainage.
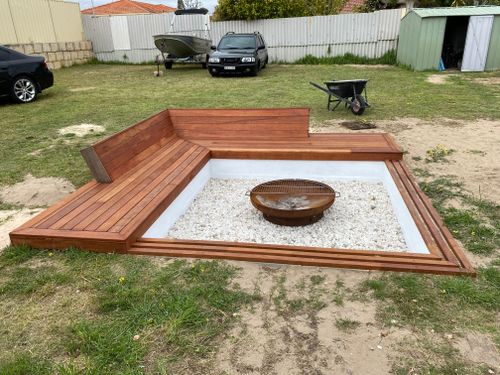
Step8. To complete the ambiance, install festoon lights. Now you’ll enjoy spending time in your backyard year-round. Whether it’s summer or winter, day or night, the fire pit has become the perfect spot to relax and unwind!
To create a warm and inviting atmosphere, add festoon lights around the seating area. These string lights add a soft, cozy glow, making the space perfect for any time of day or night. Whether it’s summer or winter, the fire pit will become a focal point in the backyard, providing a place to relax, gather, and enjoy the outdoors in comfort.
Building a sunken fire pit with seating is not only a rewarding project but also a valuable addition to any outdoor space. While the process can be challenging at times—especially when it comes to figuring out the angles for the backrest—it’s entirely achievable with a little patience and creativity. Once completed, the fire pit will offer a comfortable and beautiful space to unwind and enjoy the outdoors with friends and family. See more details
Source: englishoakdesigns.co.uk
Source: legacylandscapesllc.com
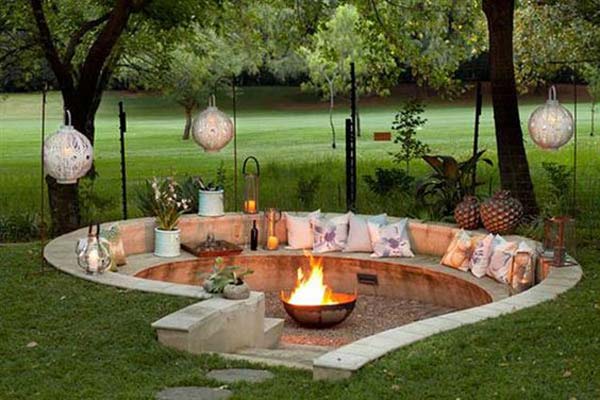
Cozy Woodland Firepit Retreat
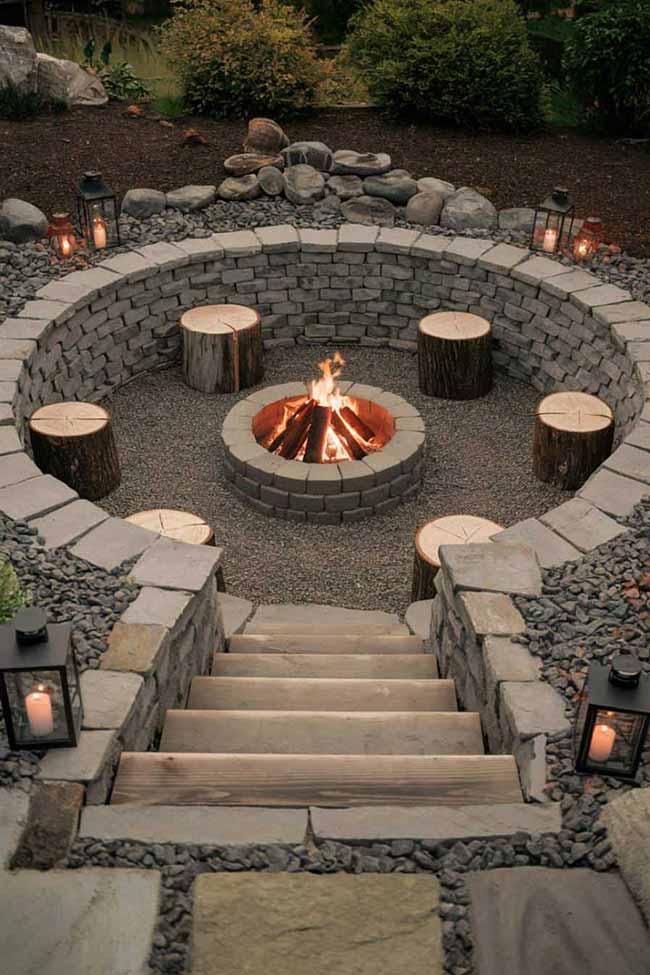
Picture this: a sunken firepit tucked away in a quiet, woodsy corner of your yard. It’s framed by split-log seating, giving it that rustic, cozy vibe.
Crushed gravel beneath your feet keeps things simple and functional, while stacked flagstone adds a touch of natural beauty. The soft light from lanterns and candles creates a welcoming, cozy glow, making it an ideal spot for unwinding or spending time with friends and family.
Vibrant Mediterranean Courtyard Escape

Ready to bring a bit of Mediterranean magic to your backyard? Start with a sunken firepit surrounded by terra-cotta tiles, and then add some colorful, patterned pillows for a pop of brightness.
Jewel-toned cushions and potted olive trees give off that classic Mediterranean flair, while climbing ivy adds a timeless charm. This vibrant setup turns your outdoor space into the perfect retreat for relaxing and enjoying the outdoors.

Source: houzz.com
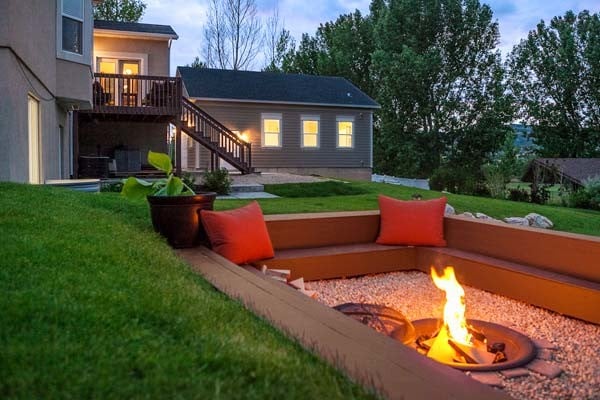
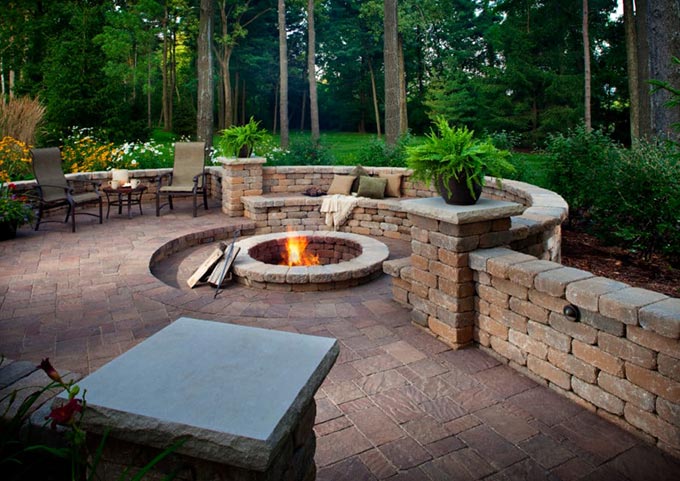
Rugged Mountain Lodge Gathering Spot

Create a rugged, lodge-inspired setting with a sunken firepit surrounded by natural stone seating. The look is tough but welcoming, perfect for those who love the great outdoors.
Add plaid blankets and stack some firewood nearby to complete the rustic look. With breathtaking views of the surrounding mountains, this space offers both practicality and beauty—a perfect place for cozy gatherings after a day of adventure.
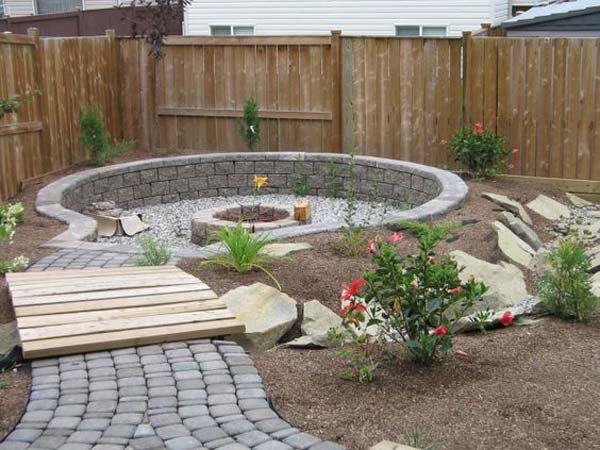
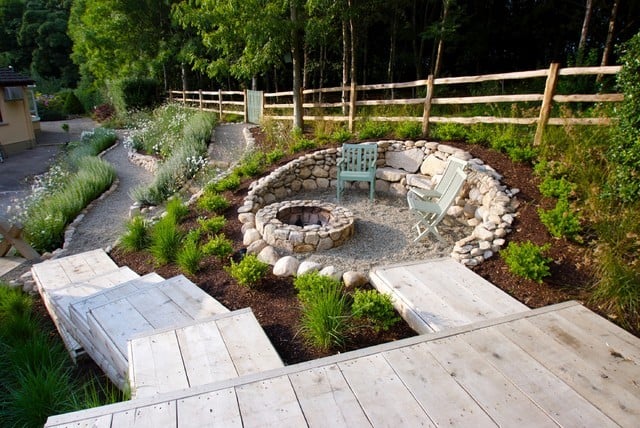
Nature-Inspired Rustic Circle
This sunken firepit blends effortlessly with nature, surrounded by low stone seating and wood planks that mimic the beauty of the outdoors.
Moss-covered stones and forest ferns encircle the area, creating a peaceful, earthy atmosphere. It’s a spot that feels untouched, making it the ideal place to sit back, relax, and enjoy the tranquility of the natural world.
Relaxing Desert Oasis Glow
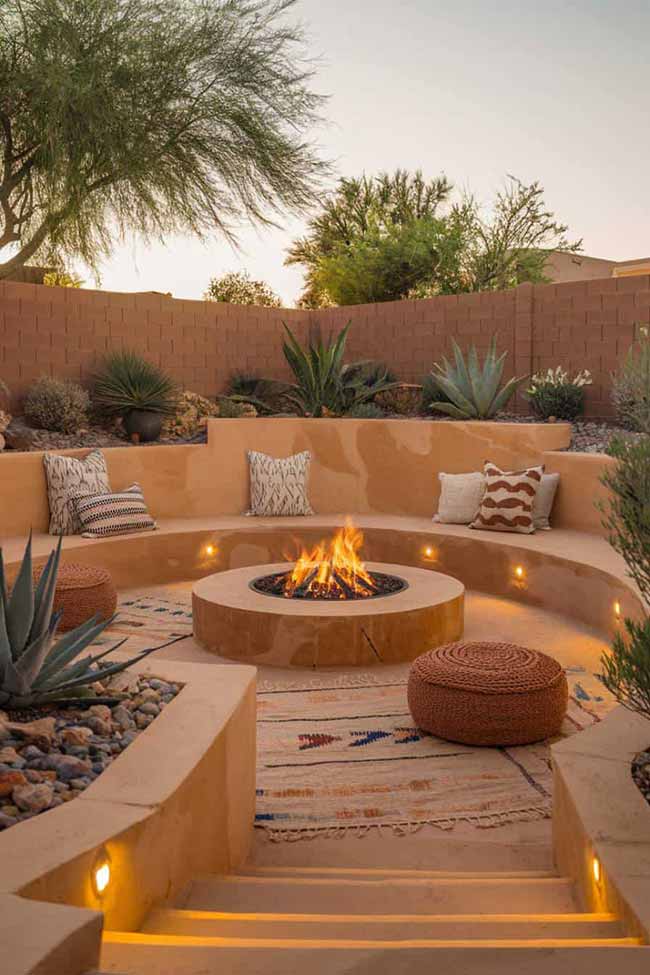
Turn your backyard into a desert retreat with a sunken firepit surrounded by golden sandstone walls and gentle terraced steps. The warm, earthy tones of the stone give the space a calm, welcoming vibe.
Surround the firepit with desert plants like agave and succulents for a low-maintenance, natural border. Add woven poufs and earthy rugs to create a laid-back, Southwestern charm—perfect for relaxing evenings under the stars.

Source: alleideen.com
Source: yelp.com
How to Build a Sunken Fire Pit:
Building a sunken fire pit can be a fun and rewarding project, but it does require some planning and preparation. Here are six steps to guide you through the process:
Step 1: Choose the area where you want to install your sunken fire pit, and mark it out with stakes and string. Then, using a shovel or backhoe, excavate the area to a depth of about 18 inches.
Step 2: Once the area is excavated, create a base using gravel and sand. Spread a layer of gravel over the bottom of the pit, then add a layer of sand on top. This will help with drainage and provide a stable base for your fire pit.
Step 3: Next, it’s time to build the walls of your fire pit. You can use a variety of materials, such as brick, stone, or concrete blocks. Stack the materials up to create a wall around the perimeter of the pit, leaving a hole in the center for the fire. Make sure the walls are level and sturdy.
Step 4: Once the walls are in place, you’ll need to install a fire ring or grate to contain the fire. This will help keep the fire contained and prevent it from spreading. You can purchase a fire ring or grate from a home improvement store, or you can make your own using metal or steel.
Step 5: To make your sunken fire pit more comfortable, you may want to add a seating area around the perimeter of the pit. This can be as simple as a few chairs or benches, or you can create a more elaborate seating area using built-in benches or retaining walls.
Step 6: Finally, add some decorative elements to your fire pit to create a cozy and inviting atmosphere. You can add fire glass or lava rock to the center of the pit for a colorful accent, or you can add plants or flowers around the perimeter to soften the look of the walls.
By following these six steps, you can create a beautiful and functional sunken fire pit that will provide hours of enjoyment for you and your friends and family.