19 Ingenious Ways to Organize Your Power Tools
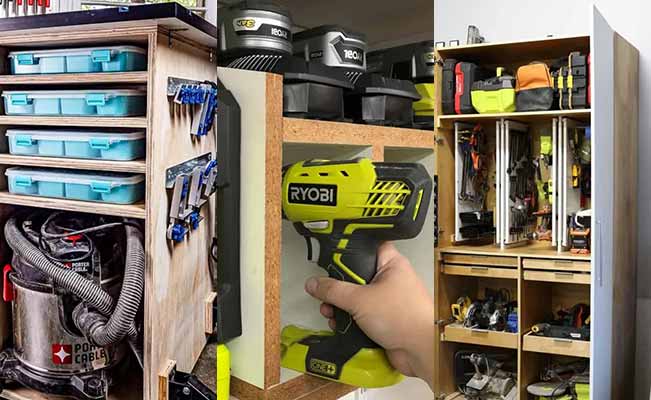
1. Transform the way you store your circular saw by using this innovative rack.
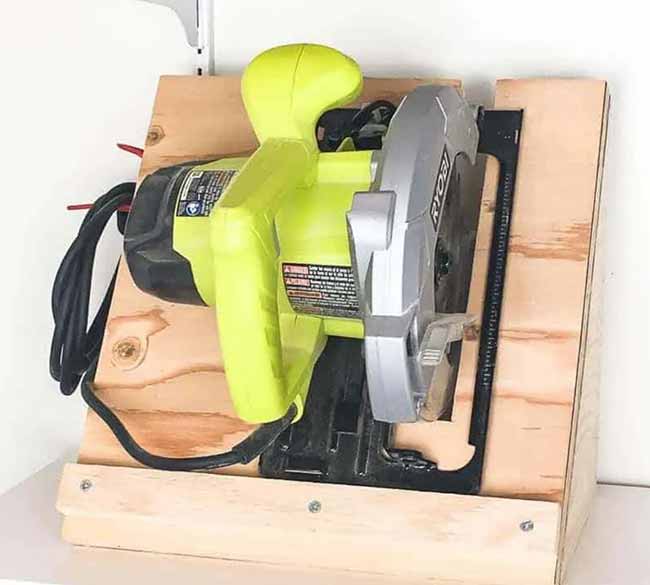
If you’ve ever wrestled with a tangled mess of power cords and feared for your circular saw’s alignment, you’ll appreciate this clever solution.
This circular saw storage rack is surprisingly straightforward, and honestly, I should have built one ages ago!
The design lets your saw rest securely on its base, keeps the cord neatly coiled, and shields the blade from any accidental damage.
It’s a game-changer for anyone tired of dealing with a cluttered workspace. Source
2. Streamline your workshop setup by incorporating a nail gun organizer that includes a convenient drawer.
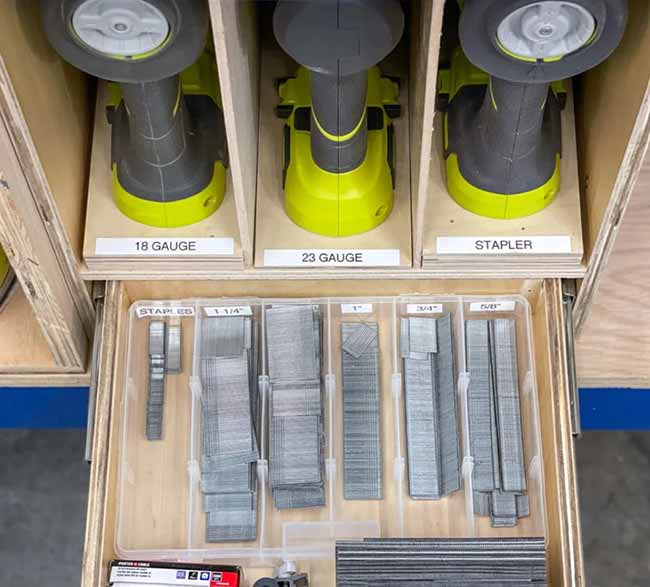
Brad nailers, pin nailers, and staplers are crucial in any workshop, but their similar looks can lead to chaos, especially when the nails end up scattered in different drawers.
Here’s a DIY nail gun organizer that tackles this mess head-on.
It neatly arranges all your tools in one spot and includes clear labels, so grabbing the right one is a breeze.
Plus, it features a handy drawer underneath to sort your nails by length and size, making your workflow much smoother. Source
3. Simplify the organization of your drills and batteries by installing this handy storage rack.
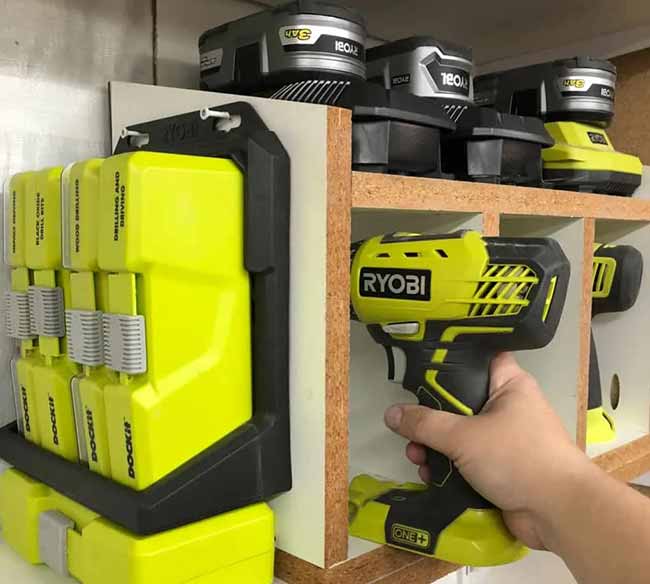
Imagine a space where your drills, batteries, and chargers are always within reach—sounds perfect, right?
This DIY cordless drill storage rack is just the thing for anyone fed up with searching for their tools or charged batteries.
It’s an incredibly quick and easy project, requiring just a few cuts to get it done.
You’ll love how organized your workspace becomes, and you’ll never have to hunt for your drill again. Source
4. Stay organized and efficient with a dedicated sander and sandpaper storage solution.
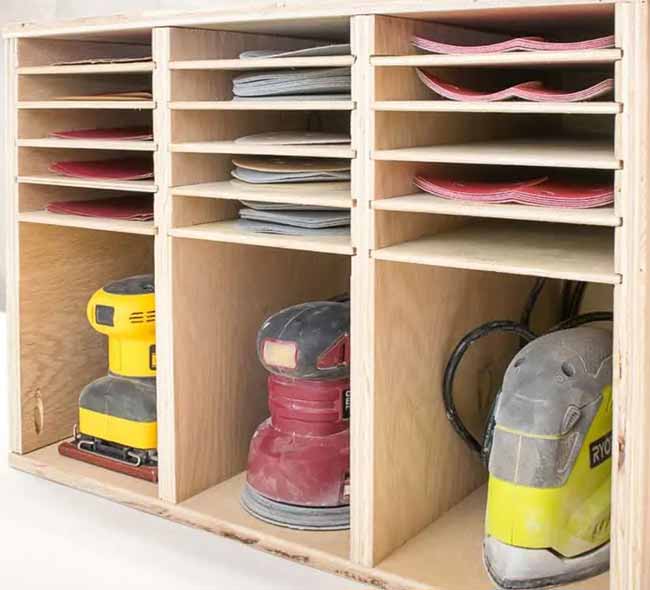
Never struggle to find the right sandpaper again with this brilliant sander and sandpaper storage rack!
Each type of sander has its designated sandpaper organizer right above it, so you’re always prepared for your next project.
The setup accommodates three sanders and five different sandpaper grits, but you can easily adjust it to fit a single sander if that’s all you need.
This rack makes keeping your sanders and sandpaper in order a total breeze. Source
5. Enhance your miter saw’s functionality by adding a stand that provides extra storage.
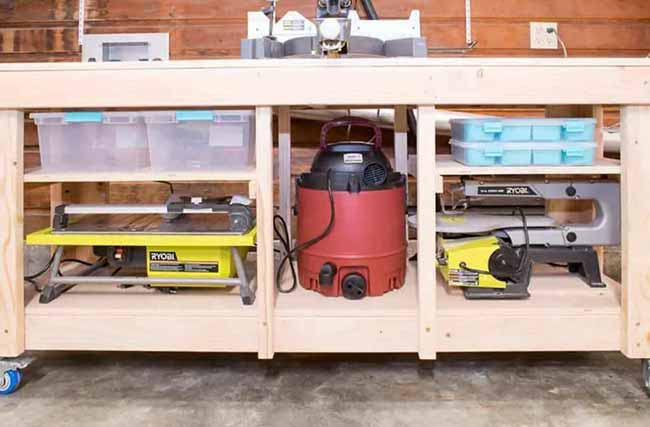
Turn your miter saw stand into a multi-functional workbench with this customizable setup!
I added an extended fence and a stop block system to make repeated cuts easier and more precise.
Plus, my shop vacuum fits neatly between two shelves, providing effective dust collection for the miter saw.
While I’ve since upgraded to a newer version (which you’ll see later), this design is a fantastic starting point if you’re setting up your workshop. Source
6. Make the most of your compact workspace by integrating a multi-tool miter saw station.
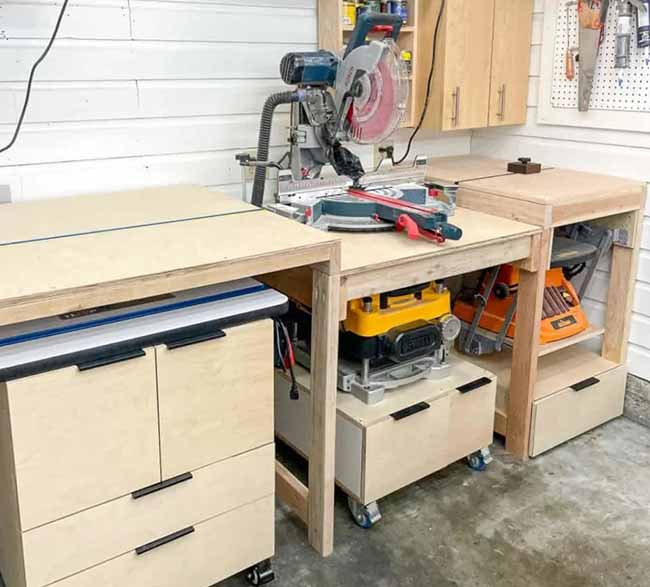
When it comes to making the most of a cramped workshop, this miter saw station is a real winner!
It cleverly combines four essential power tools into one compact setup, maximizing both your space and productivity.
You can mix and match different tools depending on your needs and preferences.
If you’re searching for more creative miter saw table ideas, there’s a whole list of options out there to spark your imagination! Source
7. Keep your planer accessible and your workspace clutter-free with a compact stand that also offers storage.
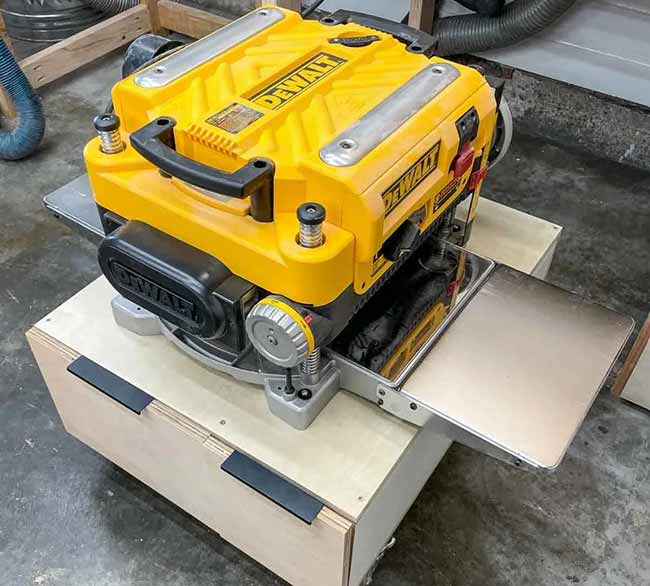
A benchtop planer can be a game-changer for woodworking, but its bulkiness can be a real challenge in a small shop.
This DIY planer stand solves that problem beautifully. It’s designed to roll neatly under your workbench when you’re not using it, keeping it out of the way.
The stand also features two deep drawers in its sturdy base, perfect for storing your extra tools and supplies. Source
8. Elevate your tool storage game by incorporating a stand with a sander lift for easy access and space-saving.
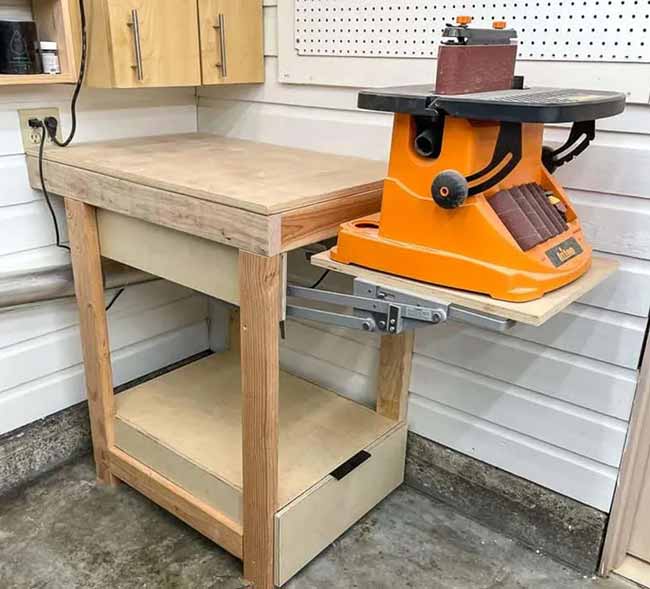
In a small workshop, every inch counts, so getting inventive with tool storage is key.
While many woodworkers opt for a flip-top tool stand with tools attached to a rotating platform, I wanted to keep my miter saw’s top surface clear for cutting.
Instead, I designed a mixer lift system that slides the tool under the work surface but pops up in seconds.
It’s an ideal solution for stashing a benchtop sander while keeping your workspace uncluttered. Source
9. Boost the stability and storage of your table saw with a custom-built stand designed for efficiency.
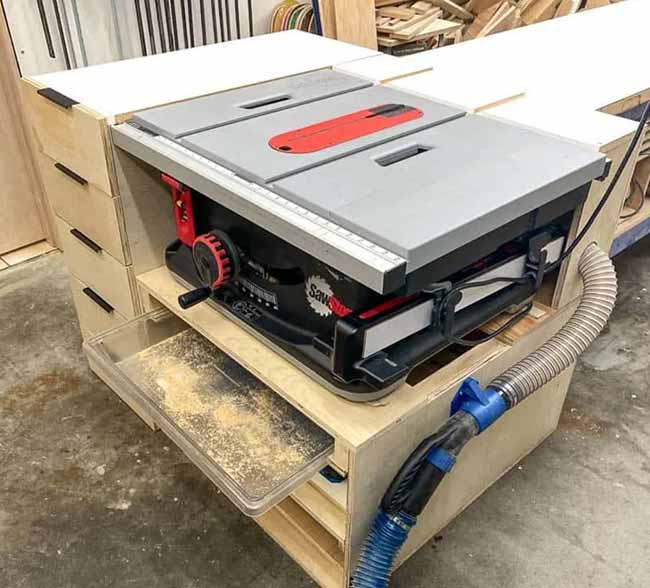
Boost your table saw’s functionality with this impressive DIY table saw stand!
I crafted this stand to fully support a crosscut sled, using melamine for a smooth, sliding surface.
The table saw sits flush with the top, and a convenient drawer underneath catches all that annoying sawdust.
It’s a fantastic addition for any workshop looking to improve efficiency and cleanliness. Source
10. Upgrade to a router table that combines functionality with space-saving storage options.
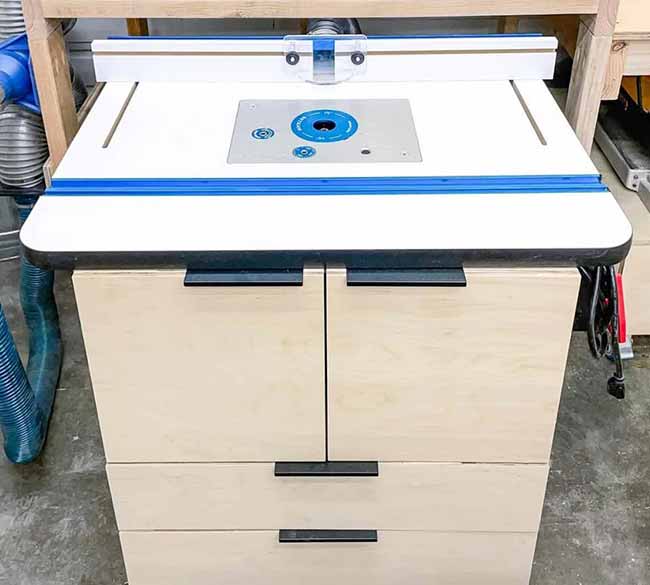
Upgrade your router setup with this clever DIY router table.
It comes with two drawers for all your essential tools and rolls smoothly under the miter saw station when not in use.
It’s a significant improvement over the old collapsible router table I used to have and takes up far less space, making it a perfect fit for a compact workshop. Source
13. Maximize your workbench’s potential by using a T track table that also serves as a storage hub.
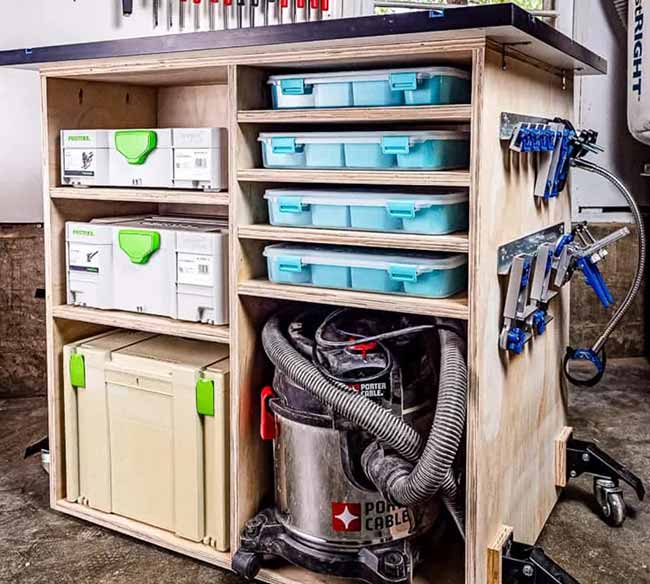
This DIY T track table is a versatile marvel!
It features a T track top, allowing you to use it as both a workbench and a clamping surface.
The shelves are perfect for storing power tool boxes and systainers, while small parts bins keep all your screws and small items neatly organized.
It’s a fantastic addition to any workshop that needs multifunctional furniture. Source
12. Optimize corner space in your garage with a tall storage cabinet that includes a lazy Susan for easy access.
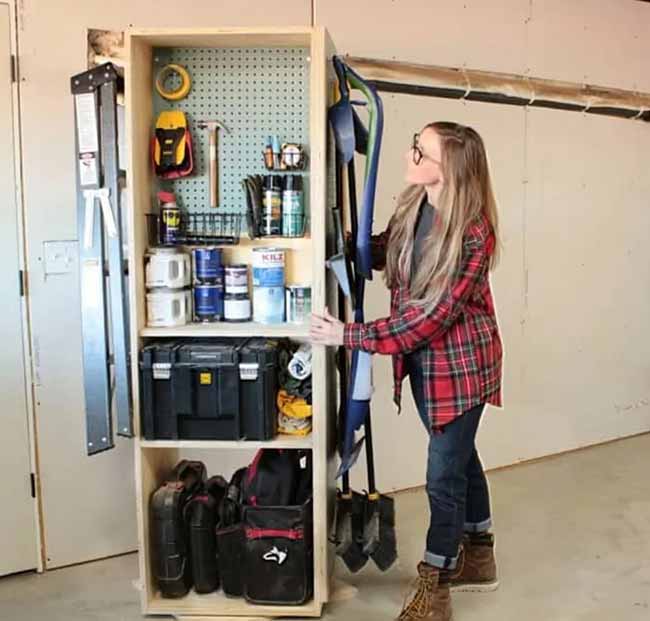
If you’re looking to get organized without taking up too much floor space, this garage storage cabinet is an excellent choice.
It’s perfect for corner storage, thanks to its lazy Susan feature that allows you to rotate the cabinet and access all four sides.
It’s an efficient solution for keeping your tools and other items neatly stored and easy to reach. Source
13. Achieve neat and accessible tool storage by using a cabinet with pull-out shelves and sliding pegboard panels.
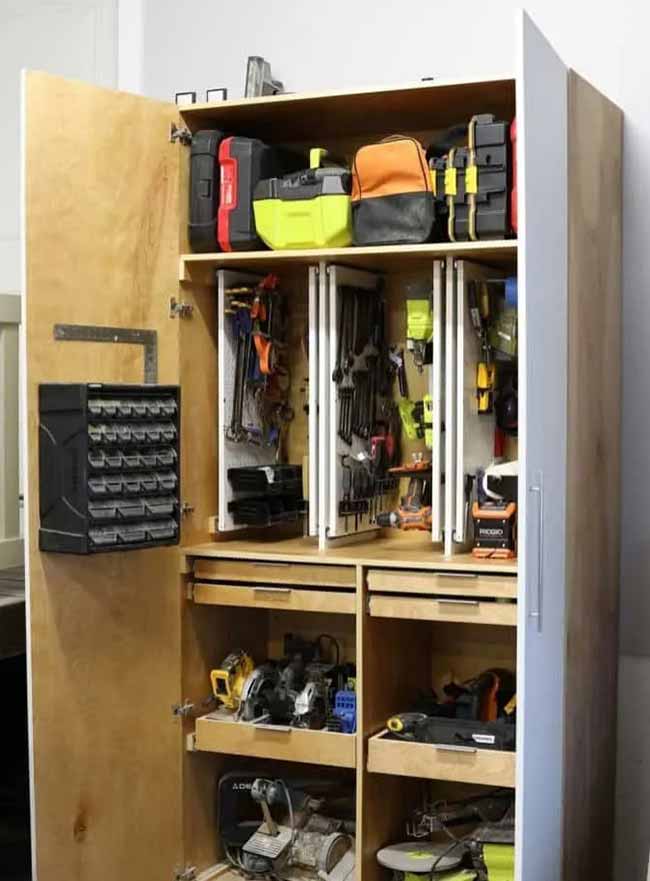
For a streamlined approach to power tool storage, consider this setup with pull-out shelves and slide-out pegboard panels.
Larger tools are easily accessible on the pull-out shelves, while smaller tools can be organized on the pegboard panels that slide out when needed.
When you’re done, everything tucks away neatly behind closed doors, keeping your workshop tidy and clutter-free. Source
14. Create an affordable and organized tool display by installing a pegboard wall tailored to your needs.
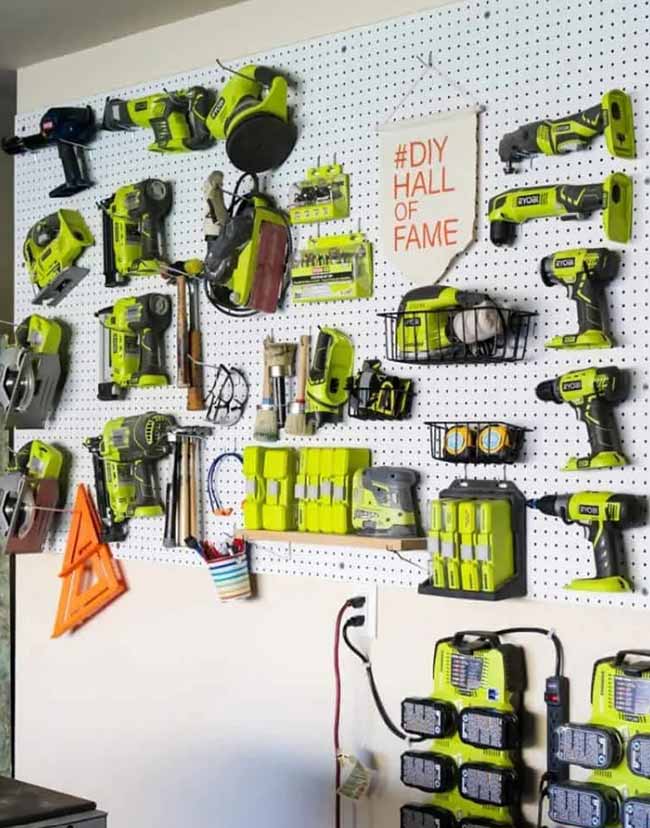
If building a complex storage system isn’t on your agenda, try this simple and budget-friendly pegboard wall.
With custom-designed hangers for various power tools, you can keep everything organized and within easy reach.
It’s a practical solution for a well-organized workshop without breaking the bank. Source
17. Keep all your sanding tools and accessories in one place with a specialized organizer designed for efficiency.
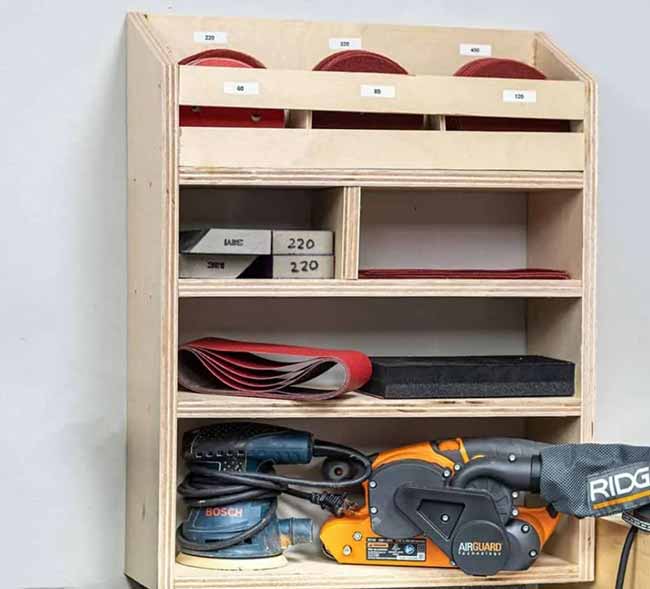
Keep all your sanders and their associated sanding discs and belts neatly in one place with this clever storage idea.
It’s designed to make sure that everything you need for sanding is conveniently stored together, so you can grab and go without having to search through multiple spots. Source
18. Simplify your workshop by grouping your most-used tools together in a single, easy-to-reach location.
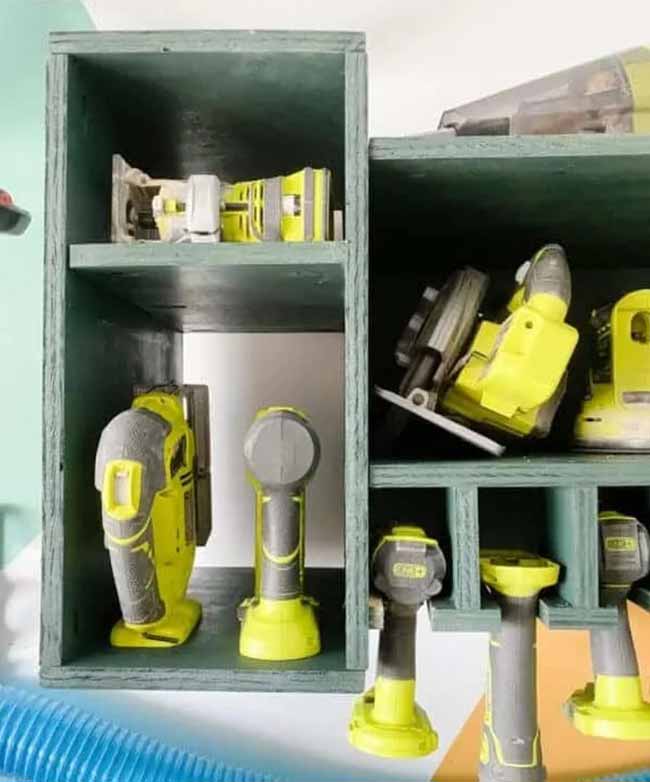
Transform your workshop by grouping all your most-used tools in one easy-access area!
This straightforward design offers grab-and-go storage for your essential power tools, freeing up valuable workbench space.
Customize the sections to fit the tools you use most often, making your workspace more efficient and organized. Source
19. Combine tool storage with a charging solution by choosing a cabinet that features an integrated charging station.
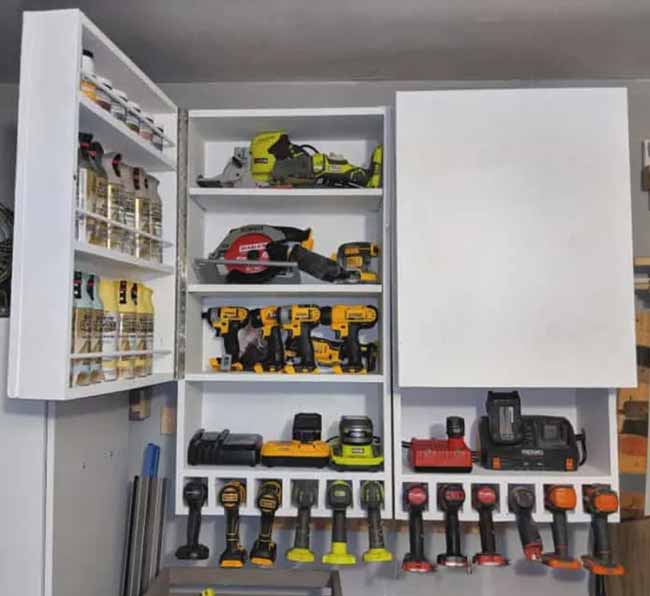
Elevate your tool storage game with this design that includes a built-in charging station!
No more fumbling around for charged batteries or searching for the charger.
The adjustable shelves let you customize the storage to fit your tools perfectly, while the hanging storage is ideal for drills and drivers.
It’s a smart and practical solution for keeping your cordless tools ready to go. Source

