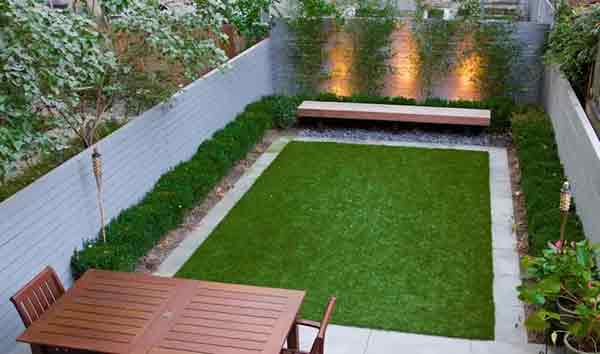
Top 19 Budget-Friendly Ways to Fix Gaps Under Your Fence
If you want to prevent pests from getting inside through the fence and keep your property safe, you should fill the gap in your fence efficiently. What are the best options available to close the fence gap? You can come across many methods nowadays. Some of the popular choices include installing a cement terrace and creating a mini garden.
Here are 19 practical and affordable fence gap fillers, including effective fence gap blockers, that bring excellent benefits. You can cover your fence gaps efficiently using these methods.
1. Add Platforms – Create a Patio Extension While Covering the Gap
This fence gap-filling method teaches you how to add a patio platform to prevent pet dogs from digging gaps and covering the gap.

If your fence has a gap at the bottom, why not turn it into a functional and stylish patio platform? This method not only fills the space but also creates an additional outdoor area for seating or decoration.
Start by measuring the length and width of the gap to determine the size of your platform. Choose durable materials such as wooden decking, composite boards, or concrete pavers that match your existing outdoor design. Clear the area under the fence, removing any loose soil or debris. If the ground is uneven, level it out and add a compacted gravel base for extra support.
Next, build a sturdy frame using pressure-treated wood, ensuring it sits flush against the fence. Secure the frame with screws and reinforce it with support beams underneath. Then, install your chosen decking material on top, fastening each plank securely. If you prefer a solid surface, lay concrete pavers evenly across the platform.
Once installed, decorate your new patio space with outdoor furniture, potted plants, or even a small seating area. This approach not only conceals the fence gap but also enhances your backyard’s functionality and aesthetic appeal.
2. Barred Up
You can shove metal bars deep down into the ground to close the gap in your fence.
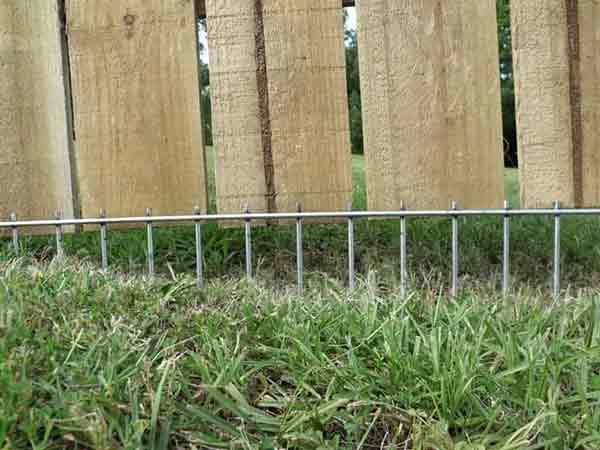
For a strong, no-nonsense way to seal that gap, metal bars are a great option. Start by measuring the width of the opening to determine how many bars you’ll need. Opt for galvanized or rust-resistant bars for durability.
Using a post hole digger or a shovel, dig holes at least 6 to 12 inches deep along the gap. Space them evenly so they form a solid barrier when inserted. Once the holes are ready, push each bar into the ground, ensuring they are level and aligned with the fence.
For extra stability, you can pour quick-set concrete around the base of each bar and let it cure. Once everything is secured, double-check for any remaining gaps, and just like that, your fence is reinforced and escape-proof!
****************************************************************
You May Also Like: 11 Effective Ways to Increase the Height of a Chain Link Fence
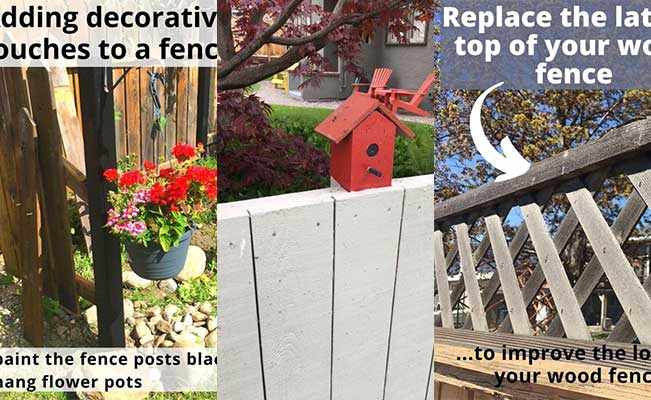
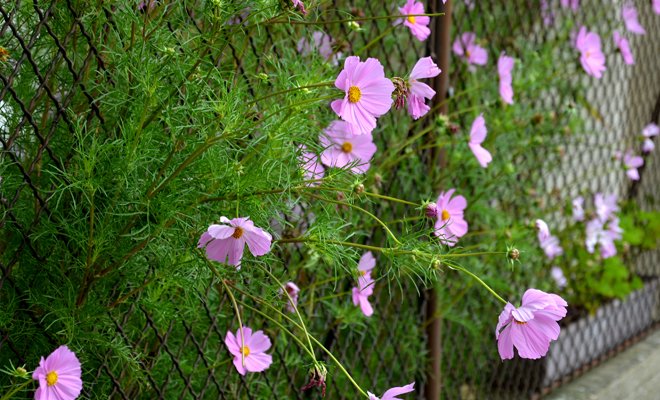
3. A Mini Garden – Fill the Gap with Greenery
If you want to learn how to use plants to cover the fence gap, you can follow this simple method.
Why not turn that fence gap into a beautiful garden feature? The first step is choosing plants that suit your space—climbing vines, shrubs, or even potted plants can all do the trick.
If you want a quick solution, place large planters or flower boxes directly in front of the gap. This instantly blocks the space while adding some natural beauty.
If you prefer a more permanent fix, clear the ground of weeds and debris, then plant dense shrubs like boxwood or holly.
For an elegant touch, install a trellis and grow climbing plants like ivy, jasmine, or wisteria. Keep your plants well-watered and trimmed to maintain coverage.
Over time, you’ll have a lush, green barrier that blends seamlessly with your fence!
4. Brick It – A Durable and Decorative Solution
You can cover minor fence gaps using brick lining. Various types of bricks can be used to make the design colorful.
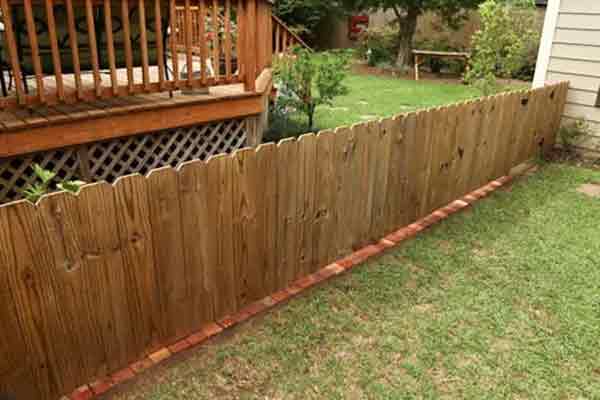
Bricks are a classic way to close fence gaps while adding a decorative element. Start by measuring the length of the gap so you know how many bricks to buy. Choose bricks that complement your fence’s color and style.
Dig a shallow trench—about 2 to 4 inches deep—along the gap. This will help keep the bricks in place and prevent shifting.
Lay a base of sand or gravel for drainage and stability, then start placing your bricks one by one, pressing them firmly into the ground.
For a stronger hold, use mortar or landscape adhesive to keep them locked together.
Once all the bricks are in place, fill any remaining spaces with sand or soil. Let everything settle for a day, and enjoy your newly sealed, stylish fence!
You May Also Like: Top 11 Cheap Chain Link Fence Privacy Ideas
5. Hedging Your Bets – A Natural, Long-Term Fence Filler
Do you want to learn how to use hedges to help create a solid barrier that fills the fence gap efficiently? This hedging idea is the best choice
If you want a fence that blends seamlessly into your yard, hedges are a fantastic way to fill gaps while adding greenery and privacy. Start by choosing the right hedge plants—fast-growing options like boxwood, privet, or arborvitae work well.
Before planting, measure the gap and clear the area of weeds or debris.
Dig a trench about twice the width of the root ball for each plant, spacing them evenly for full coverage.
Place the plants in the trench, fill with soil, and water thoroughly. For a fuller look, trim the tops to encourage bushier growth.
Over time, your hedges will form a thick, natural barrier that not only fills the gap but also enhances your yard’s aesthetic.
6. Gone Gravelly – A Quick and Low-Maintenance Fix
Use gravel effectively to close the gaps in your fence. This fence gap idea helps you fill the ditches and dips easily.
Gravel is an easy and effective way to close gaps under your fence, especially if the ground is uneven. Start by measuring the gap and determining how much gravel you’ll need.
Clear out any loose soil, weeds, or debris in the gap area. If you’re dealing with a deep trench, fill it with a base layer of compacted soil or sand first.
Then, pour the gravel evenly into the space, using a rake to spread it out. For extra stability, you can place landscaping fabric underneath to prevent weeds from growing through.
Once the gravel is settled, give it a final tamp-down to ensure it stays in place.
This method works especially well for preventing animals from digging under the fence.
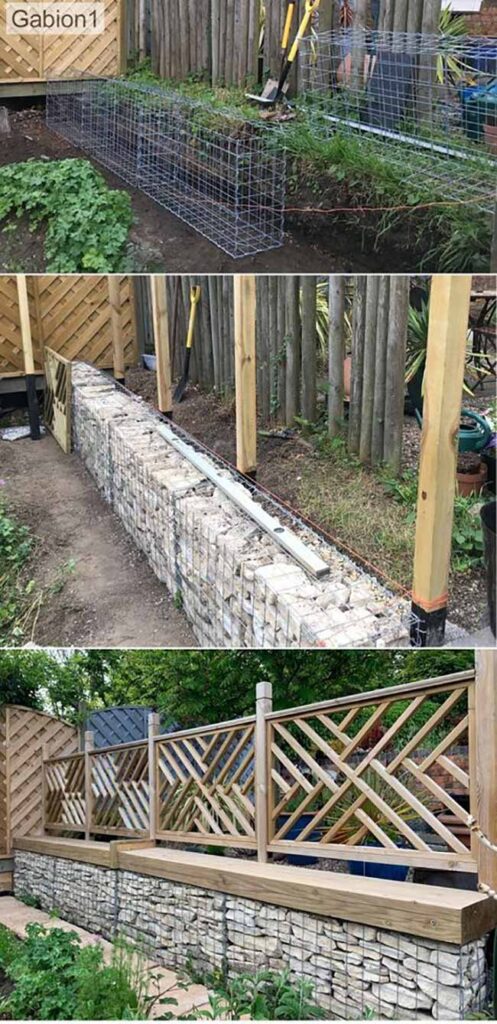
7. Build That Wall – A Strong and Stylish Solution
You can build a stone wall facade to get rid of the gaps in your wall. It requires more effort and time compared to other simple methods.

If you want a more permanent and decorative fix, building a stone wall is a solid option—but it does take some effort.
First, measure the gap and decide on the type of stone you want to use. Natural stones give a rustic look, while concrete blocks provide a more modern aesthetic.
Start by digging a shallow trench (about 4–6 inches deep) where the wall will go.
Lay a base of compacted gravel for stability. Begin stacking the stones in a staggered pattern, making sure they fit snugly together.
If you want extra security, use mortar between the stones to hold them in place. Once the wall is built, let it settle for a day before checking for stability.
This method not only fills the gap but also adds a timeless, elegant touch to your fence.
**************************************************
You May Also Like: 12 Effective Ways to Fix Gaps Under a Chain Link Fence
8. Cement Terracing
Learn how to use cement terracing to offer the best protection to your fence.
First, clear the area and dig a trench where the cement terrace will be placed.
Install wooden boards as temporary molds to shape the cement. Mix and pour the concrete into the trench, smoothing it out with a trowel.
If you want a decorative look, you can press stones or bricks into the wet cement.
Allow the concrete to cure for at least 24 hours before removing the molds. Once dry, your fence will have a solid, reinforced base that effectively seals any gaps.
9. Add A Kickboard
This method teaches you how to add mold and water-resistant wooden panel kickboard to fill the gaps in your fence.

Start by measuring the length of the fence gap to determine how long your wooden panel needs to be. Opt for mold- and water-resistant wood like pressure-treated pine or cedar.
Clear the area beneath the fence and remove any debris. Align the kickboard against the gap, making sure it sits flush with the fence’s bottom edge.
Use heavy-duty screws or nails to attach the kickboard to the fence posts. For added durability, apply wood sealant or paint to protect against weather damage.
This method is particularly great for keeping out small animals while giving your fence a polished look.
**************************************************
You May Also Like: 17 Easy Ways to Upgrade Your Wooden Fence Without Paint
10. Add A Mini Gate – A Secure and Convenient Pet Door
Cover fence gaps using a mini gate. You can use lumber and metal clips to make this gate.
If you want to give your pet a safe entry and exit point while still keeping your yard secure, installing a mini gate is the perfect solution.
This method fills the fence gap while allowing controlled movement for small pets like dogs or cats.
Start by measuring the width and height of the gap, ensuring the gate will be the right size for your pet.
Cut wooden planks to form a sturdy frame, using metal brackets or wood glue to join them together. For extra strength, add diagonal cross braces inside the frame.
Attach durable metal hinges to one side of the gate and fix them to the fence post. On the opposite side, install a secure latch that can be locked when needed.
If your pet is small, consider adding a mesh or wire panel inside the wooden frame to prevent them from squeezing through. Finally, finish the gate with weatherproof paint or sealant to protect it from outdoor elements.
This mini gate provides a controlled way for your pet to move while keeping unwanted animals out and ensuring your yard remains enclosed.
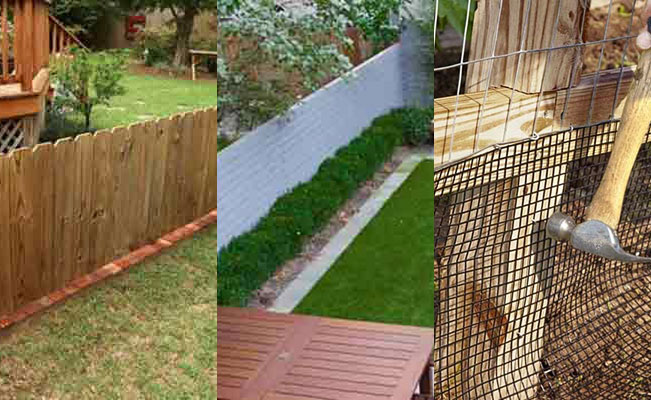
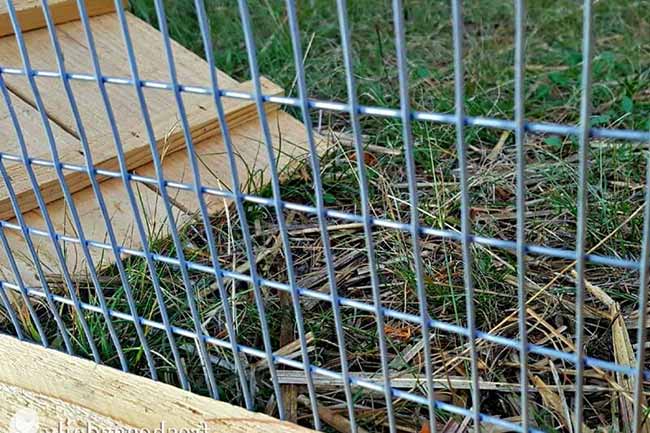
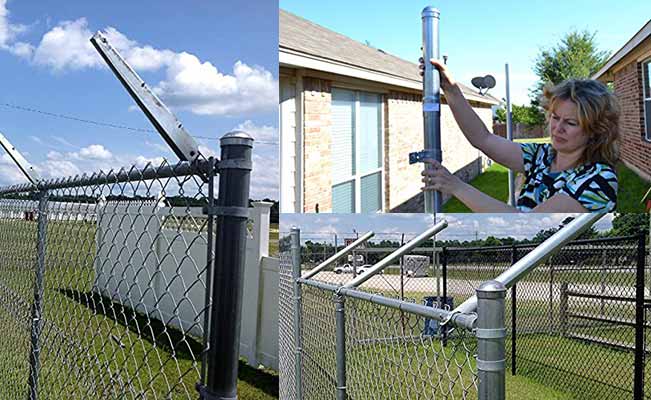
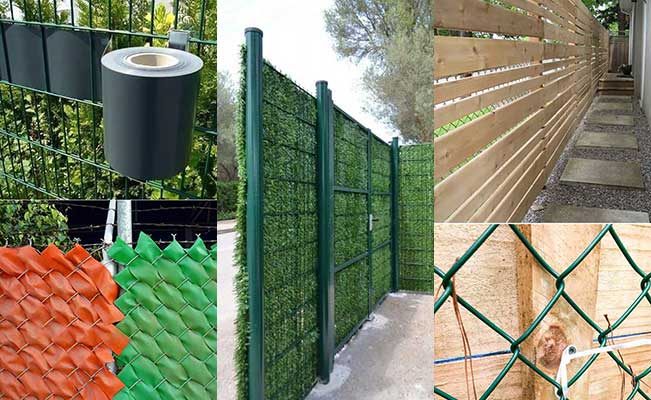
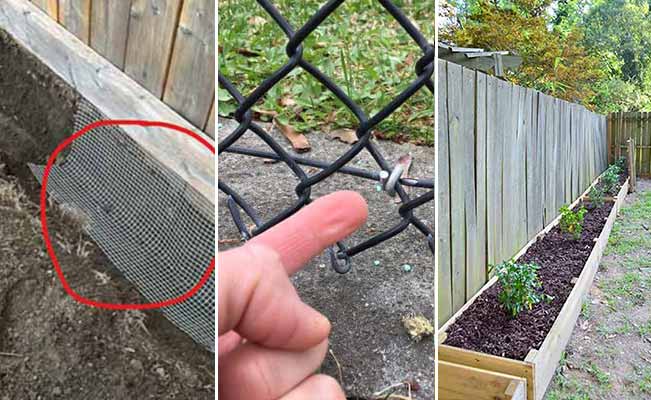
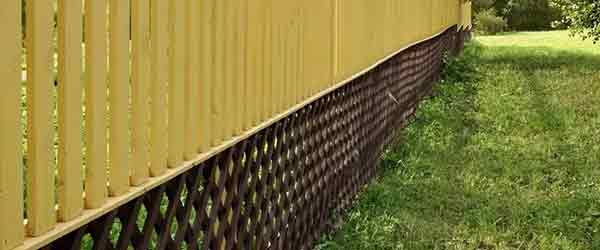
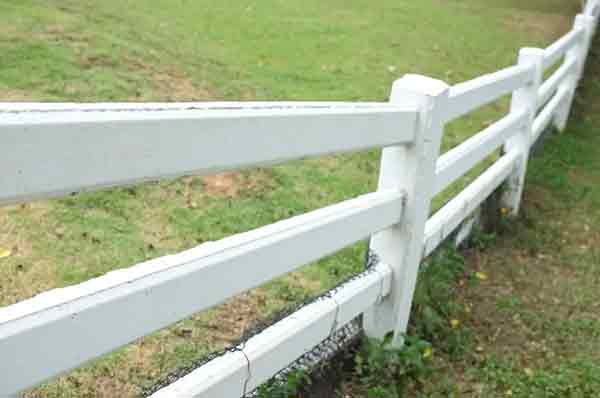
11. Chicken Wire or Wire Mesh
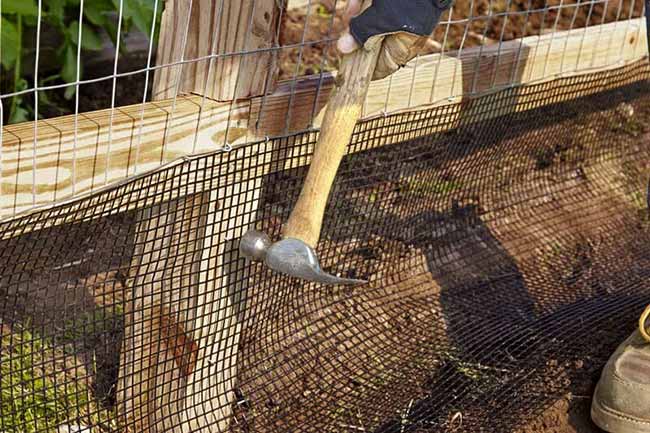
Chicken wire or wire mesh is an excellent option for closing gaps, especially under chain-link or wooden fences, preventing pets and animals from squeezing through.
To seal the gap:
- Begin by digging a trench along the base of the fence.
- Cut a piece of wire mesh or chicken wire, ensuring it’s long enough to cover both the height of the gap and the depth of the trench.
- Secure one end of the wire to the bottom of the fence using staples or nails, depending on whether it’s a wood or chain-link fence.
Once the wire is fastened to the fence, bury the lower part of the mesh in the trench, then refill the trench with the soil you dug out. This will help hide the wire and make it harder for animals to dig under it. For extra reinforcement, place a few rocks on top of the filled trench. This added weight will prevent digging and help secure the wire in place.
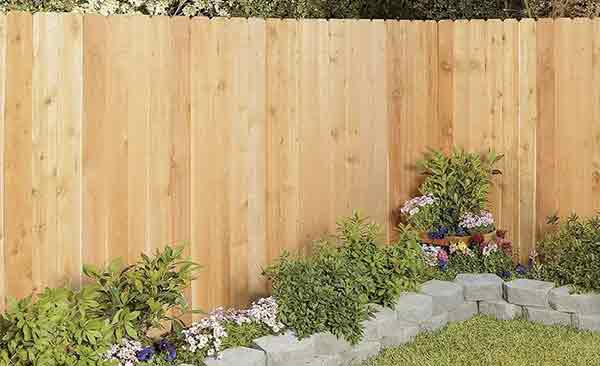
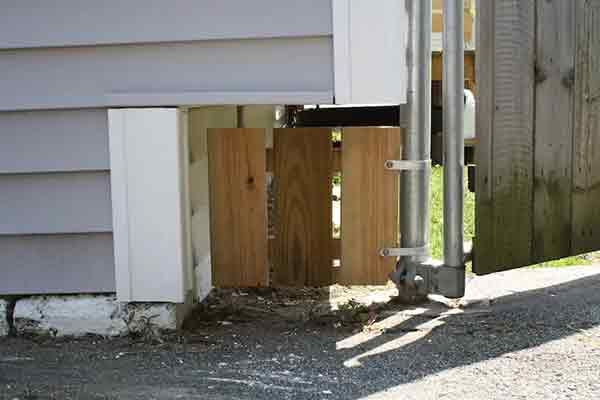
12. Timber Planks
Cedar is a strong, weather-resistant wood that naturally repels termites, making it an excellent choice for closing fence gaps. If your wooden fence has an opening, cedar pickets can seamlessly blend in while providing durability.
To seal the gap:
- Measure and cut timber planks to match the length of the opening.
- Position them horizontally for a secure fit.
- Use a drill to fasten the planks firmly over the gap.
If the area beneath the fence is uneven, you may need to dig slightly to create enough space for installation. Once the planks are in place, remember to refill and compact the soil to ensure stability.
13. Go For A Bottom Lattice – Stylish and Airy Cover
Fence holes can be covered using a bottom lattice. This idea puts forward a practical method to get the job done.
A bottom lattice adds charm to your fence while closing gaps effectively.
Start by measuring the gap’s length and height, then cut lattice panels to fit.
Choose wood or vinyl lattice, depending on your style preference and weather conditions.
Clear the area under the fence and level the ground. Attach the lattice to the fence using screws or nails, making sure it’s flush with the fence’s bottom edge.
For added security, reinforce the bottom with wooden stakes driven into the ground.
Paint or stain the lattice to match your fence, creating a seamless, decorative barrier that also improves airflow.
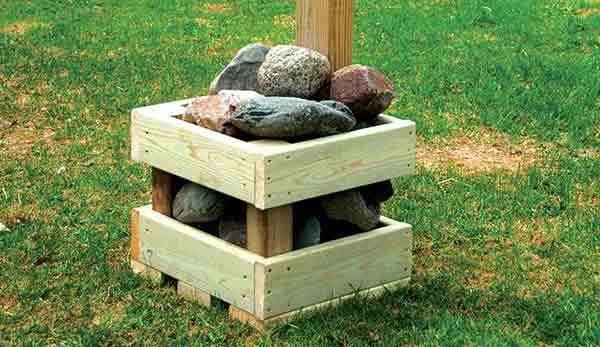
14. Anchor Your Posts
You can make a boxed anchor that is filled with stones to cover holes. Concrete is also a good choice.
15. Wired Up
This method talks about adding chicken wire around the fence base to cover holes.
Fill Gaps with a Lovely Garden
Enhance your fence by creating a charming garden to fill gaps and add natural beauty. Choose tall plants like ornamental grasses, shrubs, or flowers strategically placed to hide openings and create a visual barrier.
This boosts privacy and security while adding vibrant colors and textures to your outdoor space. Opt for low-maintenance plants for easy care and enjoy the seamless blend of nature and function with your chain-link fence.
Ensure your fence gate complements this upgraded look for a cohesive design.
16. Adding Soil or Creating a Mound
Fill those empty spaces by adding soil and shaping it into a gentle mound. While this method may not be foolproof for keeping energetic dogs from digging, it’s a cost-effective solution that works well if you don’t have pets.
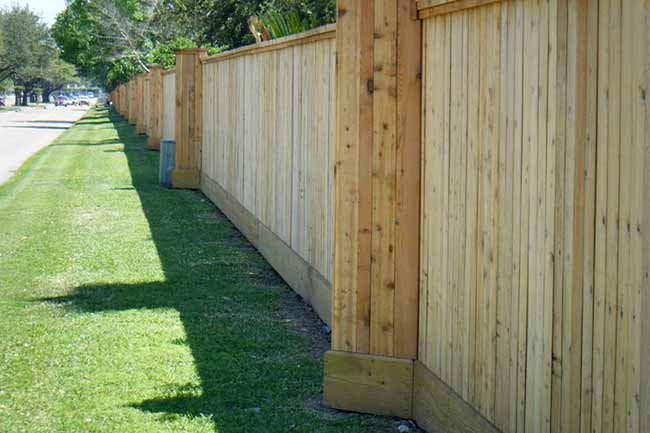
17. Wooden Inserts to Fill Gaps in the Fence
Instead of bricks, you can use horizontal pieces of wood to fill the space between the fence and the ground. Measure and cut the wooden boards uniformly. This is a great choice if you have a wooden fence because it will seamlessly blend in.
18. Creating a Small Garden
Utilize a plant nursery to fill the gaps in your fence. It serves as a natural filter, covering the openings while adding a touch of beauty to your yard. This solution not only protects your space but also complements the rustic charm of your fence. Gardening enthusiasts will particularly appreciate this green-thumb approach.
19. Filling the Gaps with Cement
If you’re looking for a durable solution, consider employing cement terracing to fill those gaps. Once the cement mixture reaches the desired texture and consistency, carefully apply it to the openings. This method ensures a sturdy and long-lasting result, effectively closing off any openings in your fence.
If you’re looking for a fence bottom gap filler, here are some practical and creative options depending on your needs — whether it’s for pets, privacy, aesthetics, or keeping critters out:
🛠️ Functional Gap Fillers
- Treated Lumber or Pressure-Treated Boards
- Simple and sturdy. Attach a horizontal board along the bottom.
- Good for uneven ground (you can cut to match the contour).
- Best for privacy and security.
- Lattice Panels
- Adds a decorative touch while filling the space.
- Allows airflow and visibility — great for gardens.
- Metal Flashing or Steel Panels
- Durable and chew-proof (great if you have dogs or critters).
- Can be painted to match the fence.
- Vinyl Fence Base Molding
- Matches vinyl fencing styles and clips right in.
- Great for clean, uniform looks.
- Flexible Landscaping Edging
- Great for curved or uneven terrain.
- Usually plastic or rubber, quick to install.
🐶 For Pet Owners
- Pet Barrier Mesh or Hardware Cloth
- Use zip ties or staples to secure it along the bottom.
- Keeps small pets in and other animals out.
- Dig-Proof Fence Roll (Dog-Proofing Rolls)
- Galvanized wire rolls that you bury partially.
- Stops digging and escape artists.
🌿 Natural & Creative Ideas
- Raised Planter Boxes or Stone Borders
- Fill the gap and make it beautiful.
- Also works as a deterrent for animals.

- Gabion Wall Base
- Wire cages filled with stones — looks modern and fills the space.
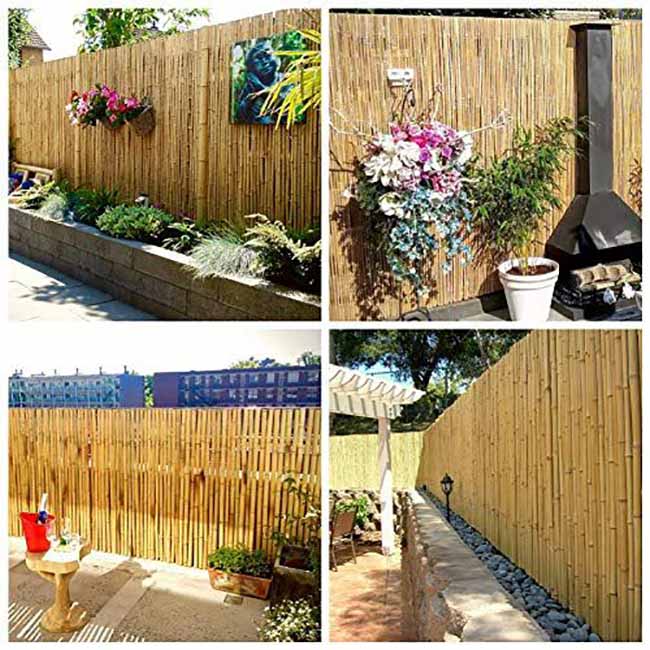
- Brushwood Panels or Bamboo Rolls
Aesthetic and eco-friendly. Good for short-term solutions.
Let me know your specific situation (pet safety? garden? uneven ground?), and I can help you pick the best option or even guide you on DIY instructions.
Why do gaps appear under a fence? How do these gaps come about?
Let’s explore the common reasons in a friendly and simple way.
Poor fence installation
Sometimes, when the fence is not installed in just right, it can create spaces underneath. This might happen if it’s not set up evenly or on a bumpy surface. Imagine your fence like a puzzle – if the pieces aren’t snug, little gaps can show up over time.
Furry Diggers
Pets, especially dogs, love to explore. They might dig their way under the fence. If the fence isn’t properly connected to the ground, it can leave a wide space for trouble.
Natural terrain
The natural lay of the land can also be a tricky player. Sometimes, the ground itself might make it hard to keep a fence gap-free. Erosion can make these gaps even bigger.
Soil movement
Picture this: if your fence sits on sandy or clay-like soil, it might start to show a gap. That’s because these soils like to settle down, creating a noticeable space between the ground and the fence’s bottom.
The Influence of Trees
Trees near the fence can be mischievous. Their roots might stretch and push the ground, making room for unexpected gaps. It’s like nature playing hide and seek with your fence!
The Impact of Heavy Rainfall
Too much rain can be a surprise party for gaps. It can soften the ground, making it shift and create openings under the fence. Raindrops might be small, but they sure can be powerful!